artist who makes 3d drawings look real
Learning
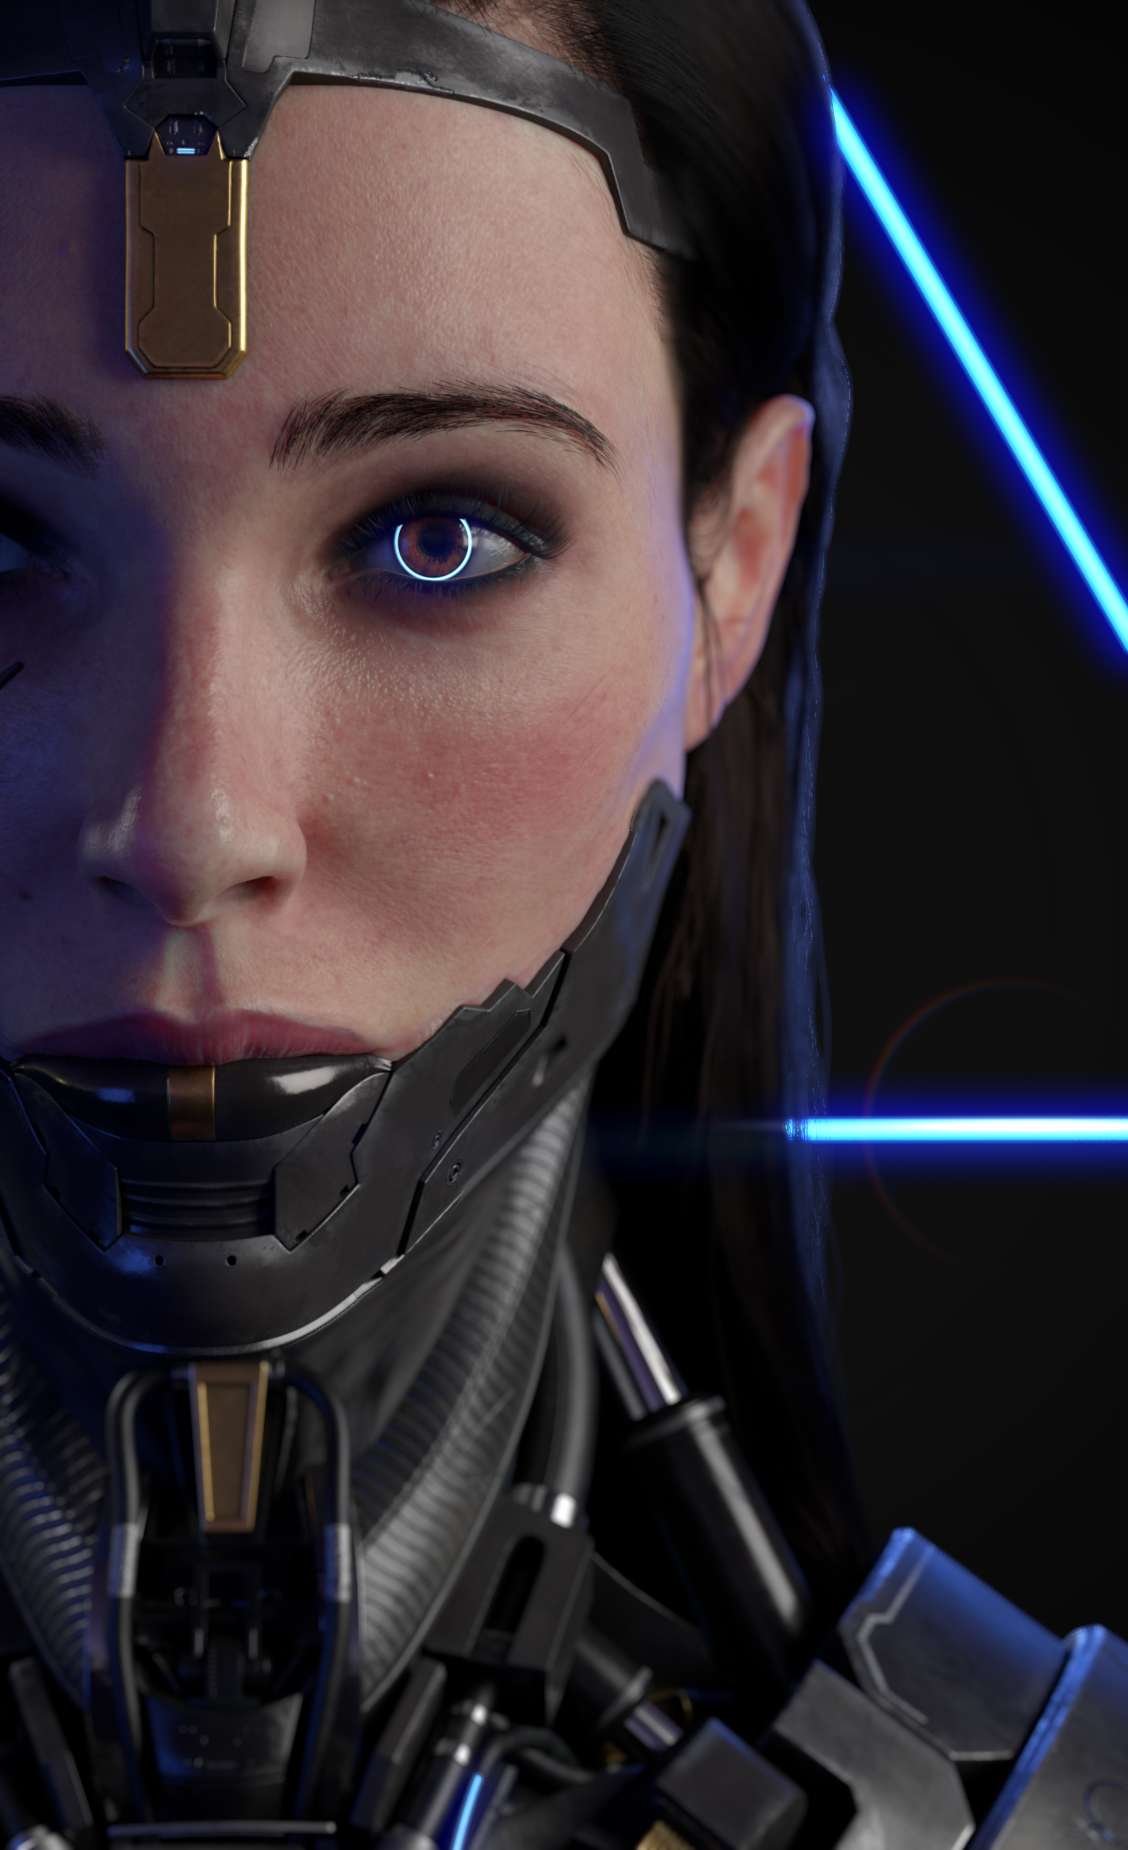
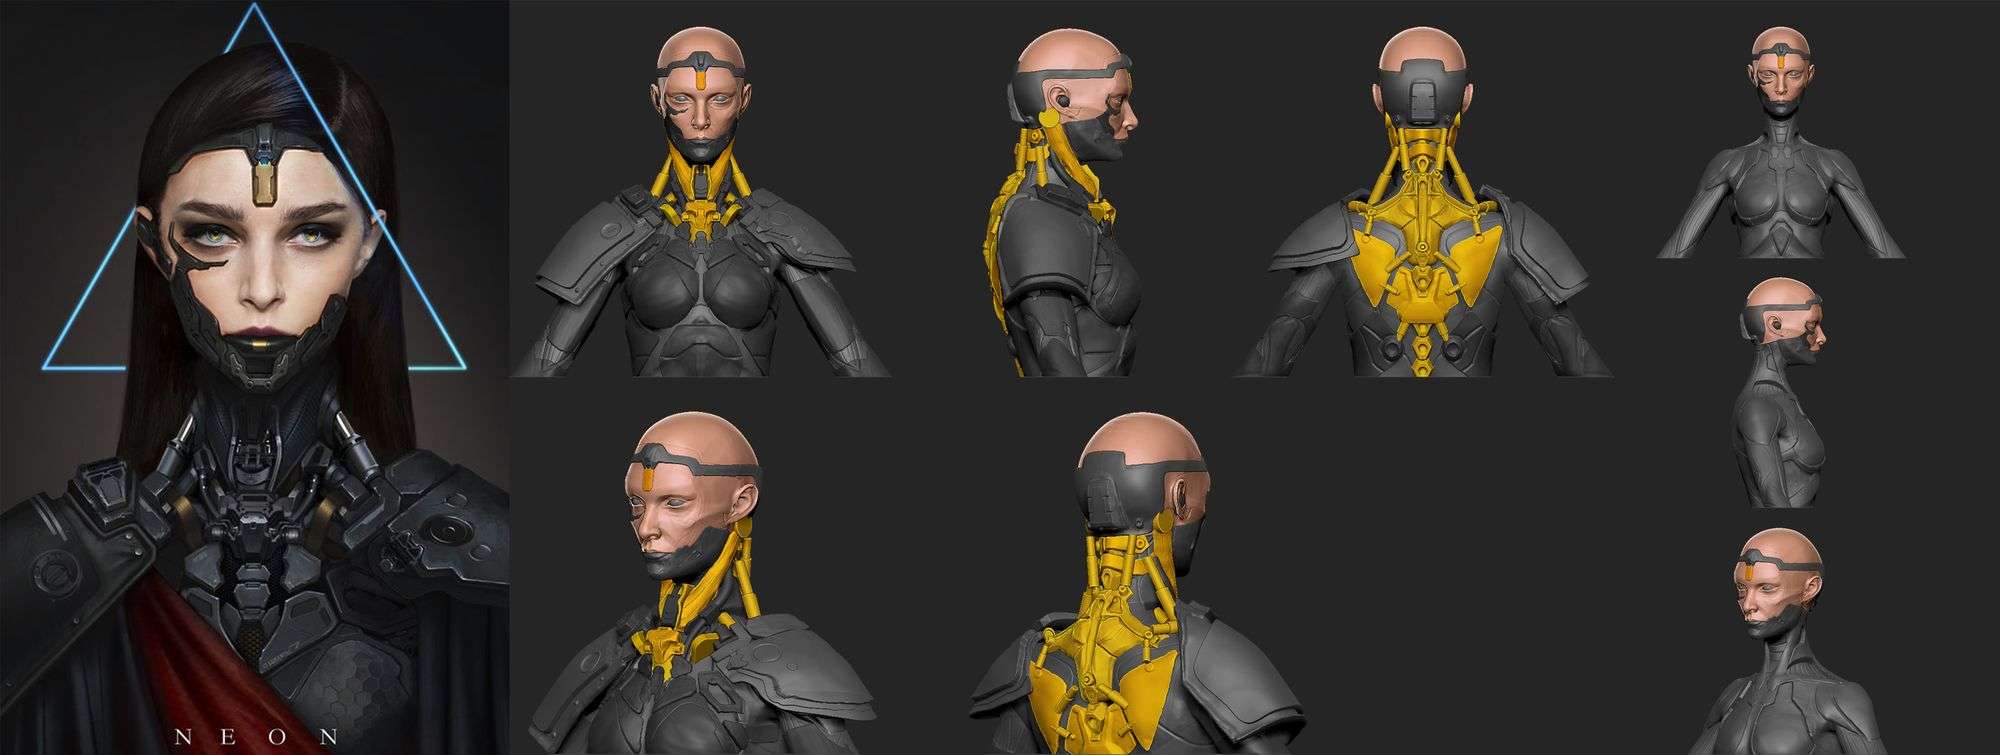
Creating a Hyper-Realistic CG Character in 3D
NEON is my last project for the intermediate level at Recollect Tank Training Centre – Online. Based on a concept by Young Qin, it was very suitable for me as I wanted to suspension into making 3d characters but nonetheless be able to apply some difficult surface techniques that I love
NEON is my last project for the intermediate level at Think Tank Training Centre – Online. Based on a concept past Immature Qin, it was very suitable for me as I wanted to pause into making 3d characters only yet exist able to apply some difficult surface techniques that I love and have passion too. In this article I volition exist explaining the process I went through, things I wish I did and even the mistakes I did too.
I hope that this article would be clear and useful for anyone making a character bust. Let'due south JUMP IN..!!
Reference
In the starting time, I try to collect as many references and like artworks as I could, to help me have a clear idea of what I volition be modeling. In some 2D sketches, some areas are just total of ink and hatches so you will have to figure these areas out and find other parts to model and put there.
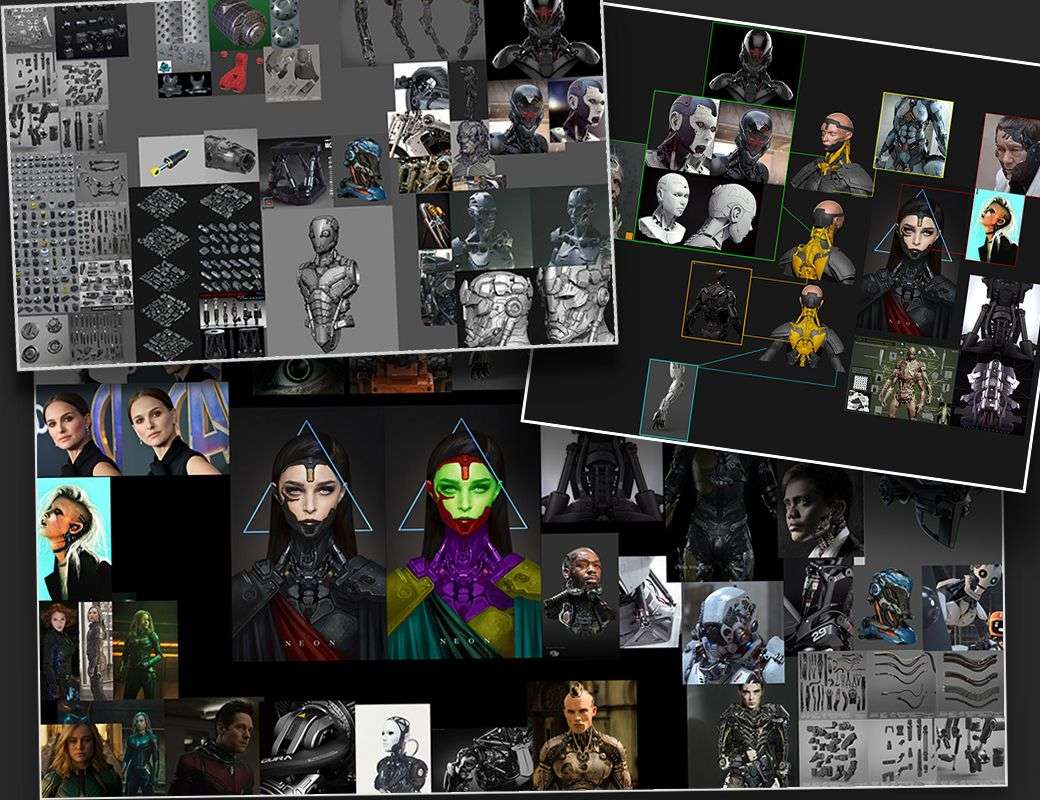
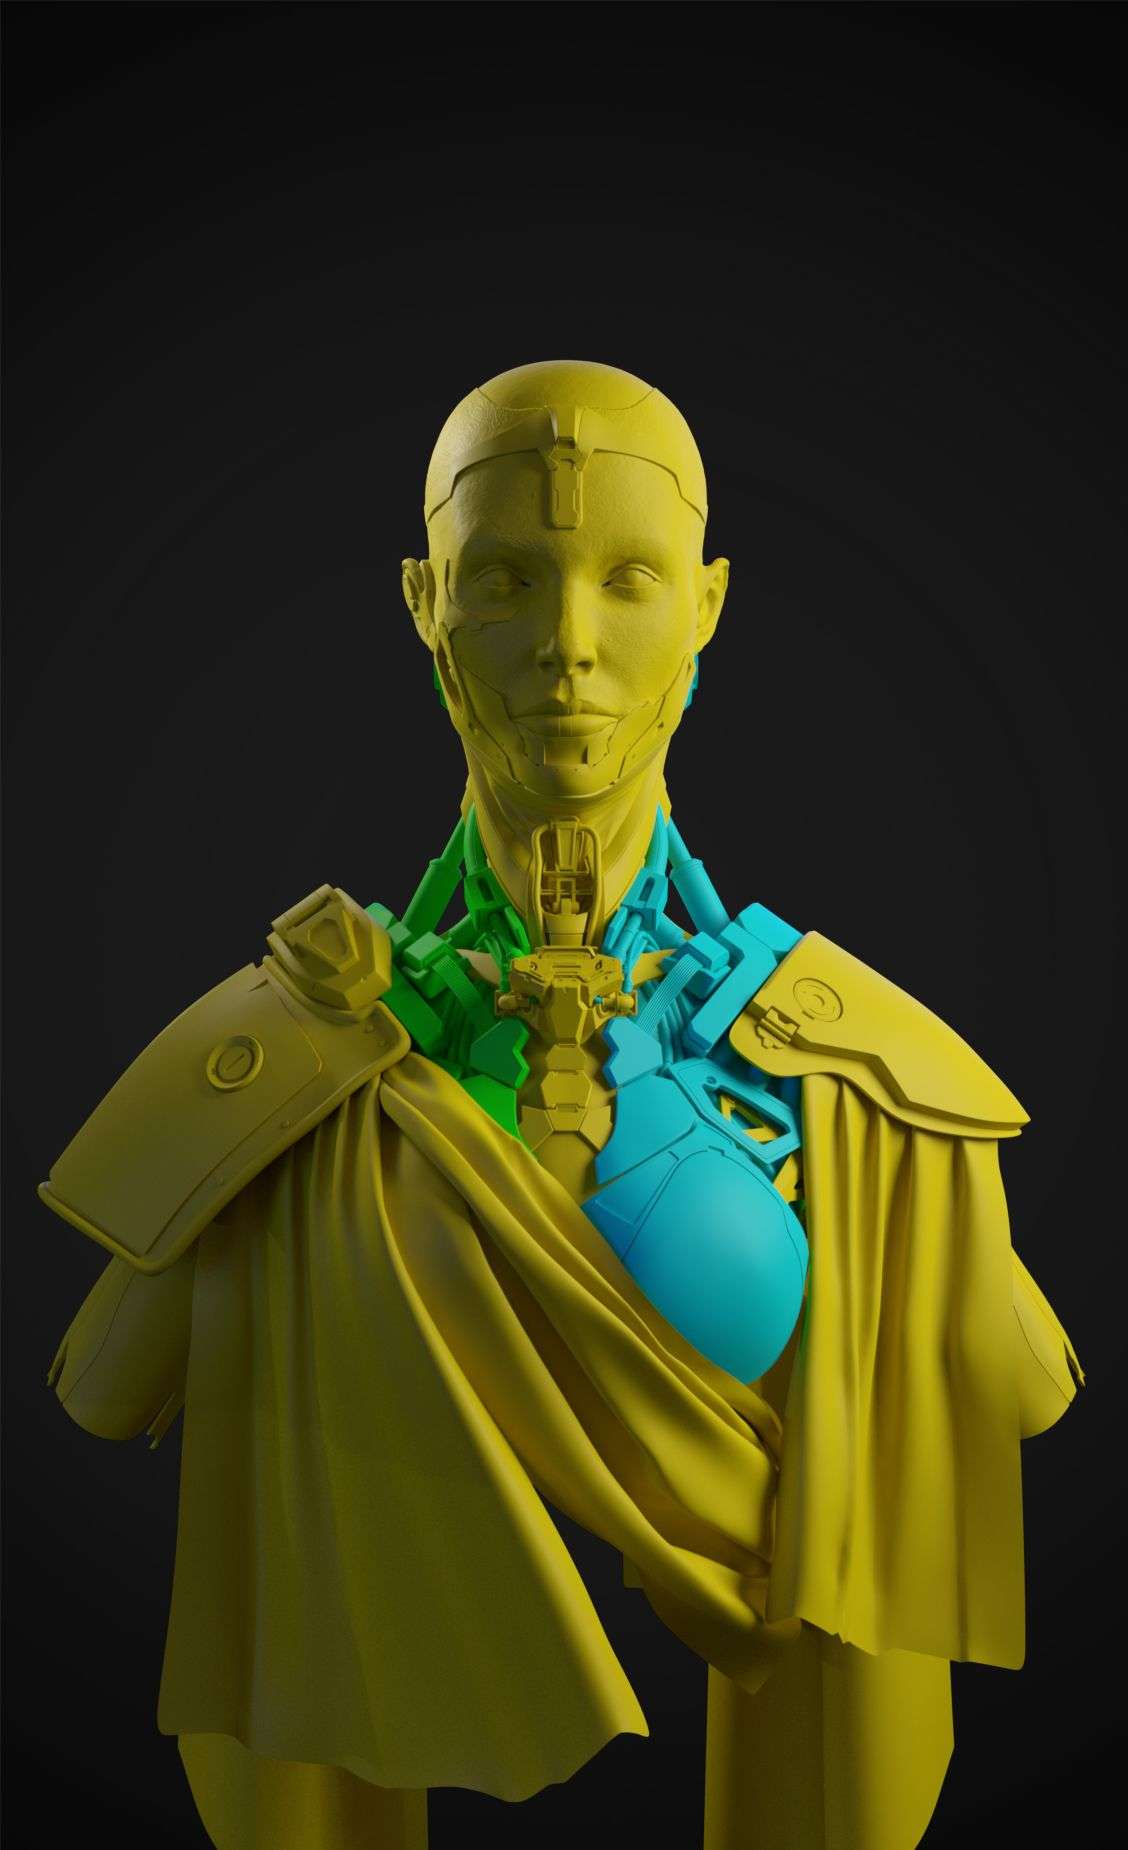
In my instance Neon is a queen with a mechanical body. This helped me to narrow my search in artworks to but Hydraulic pistons muscles and cables, not gears and wires. This step is important because having a clear idea of what you volition do volition saves a lot of time of going dorsum and forward and causes the feeling of lose therefore give it enough fourth dimension in the projection's schedule.
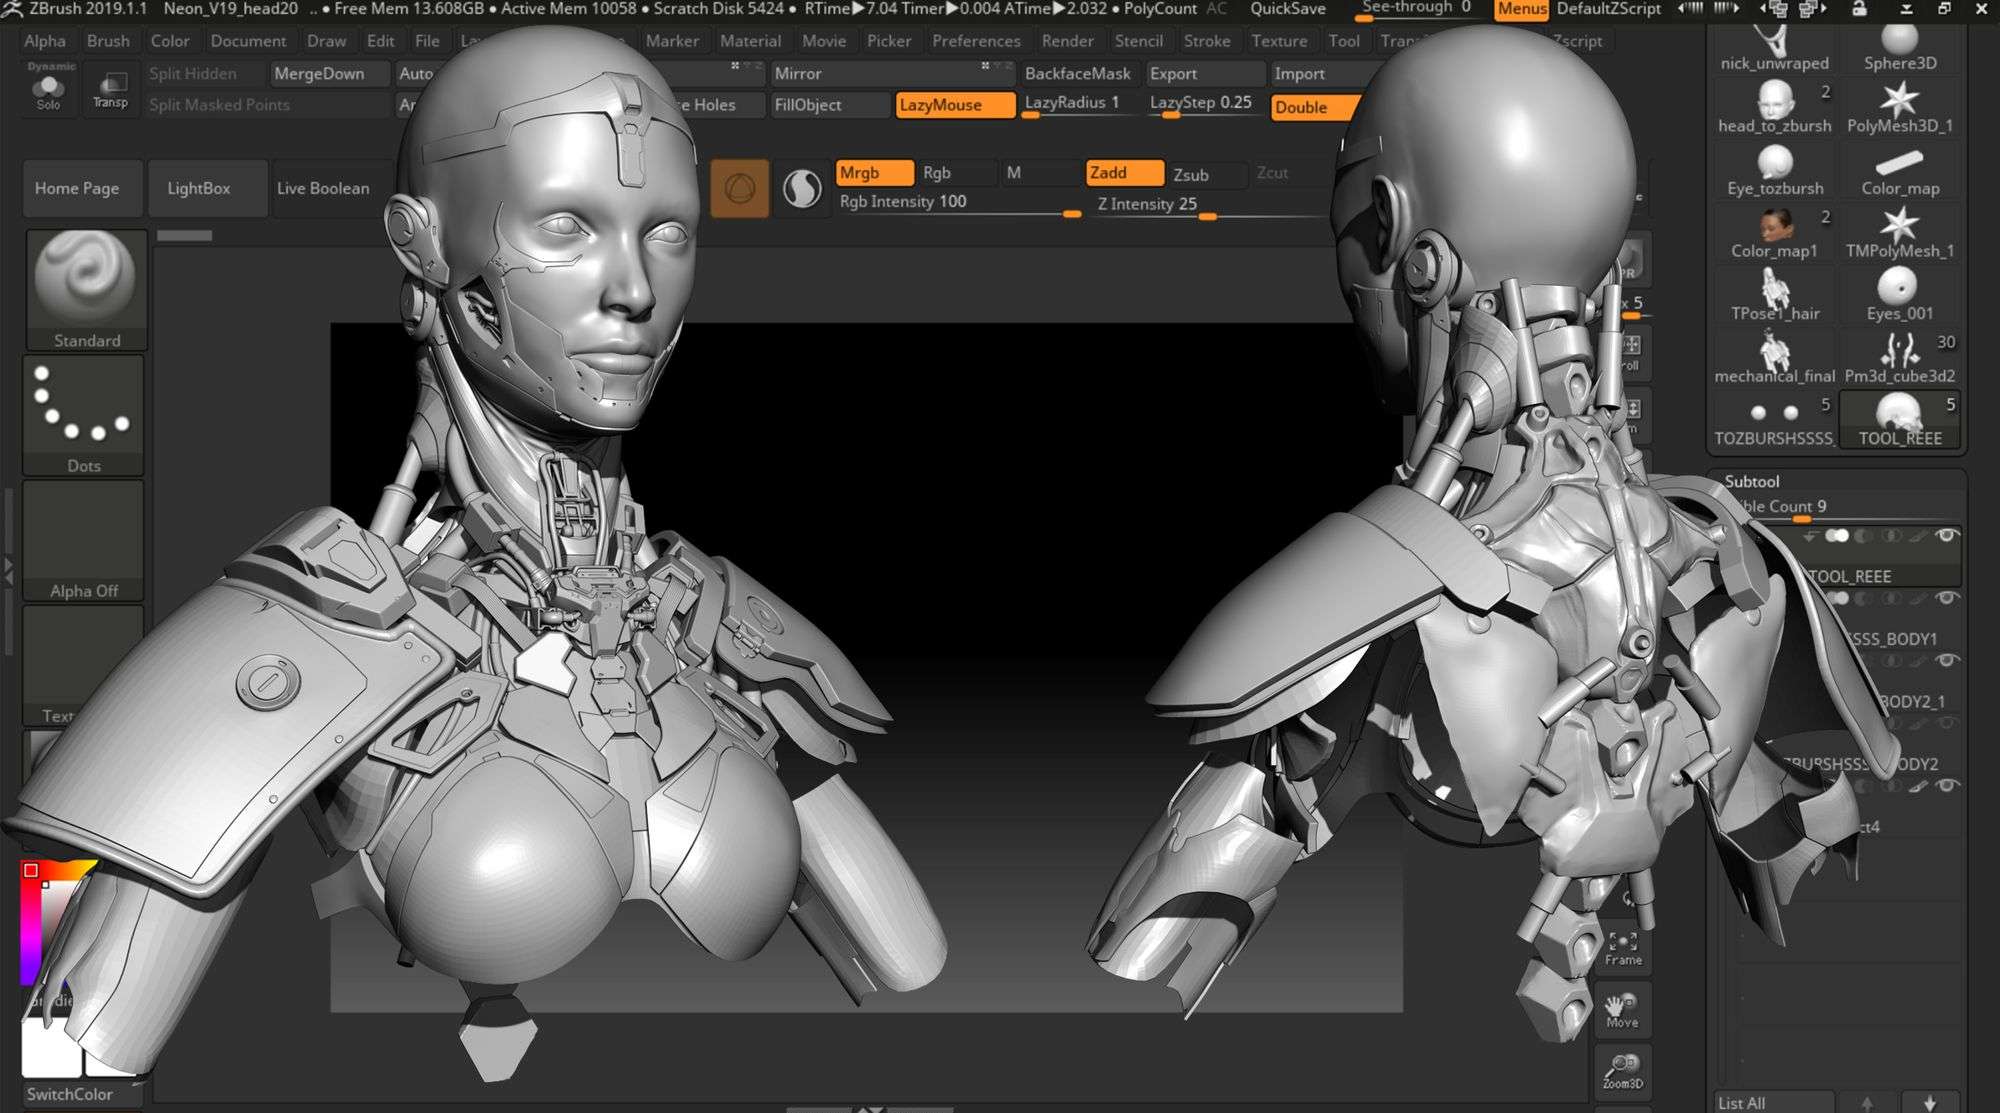
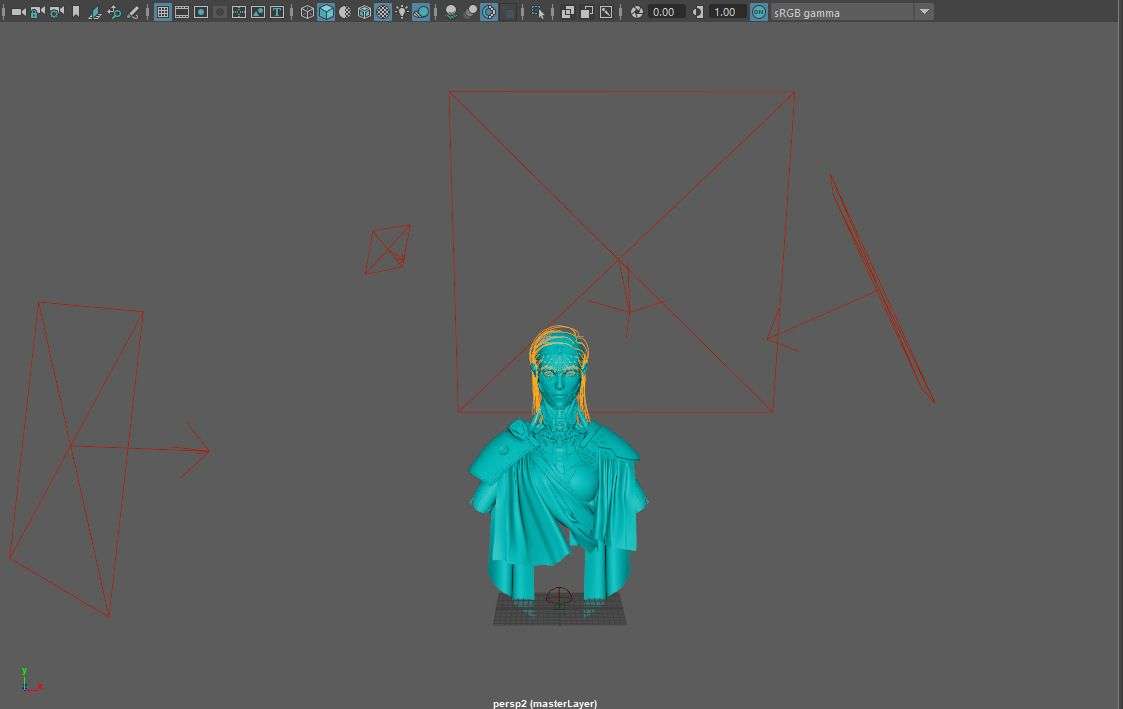
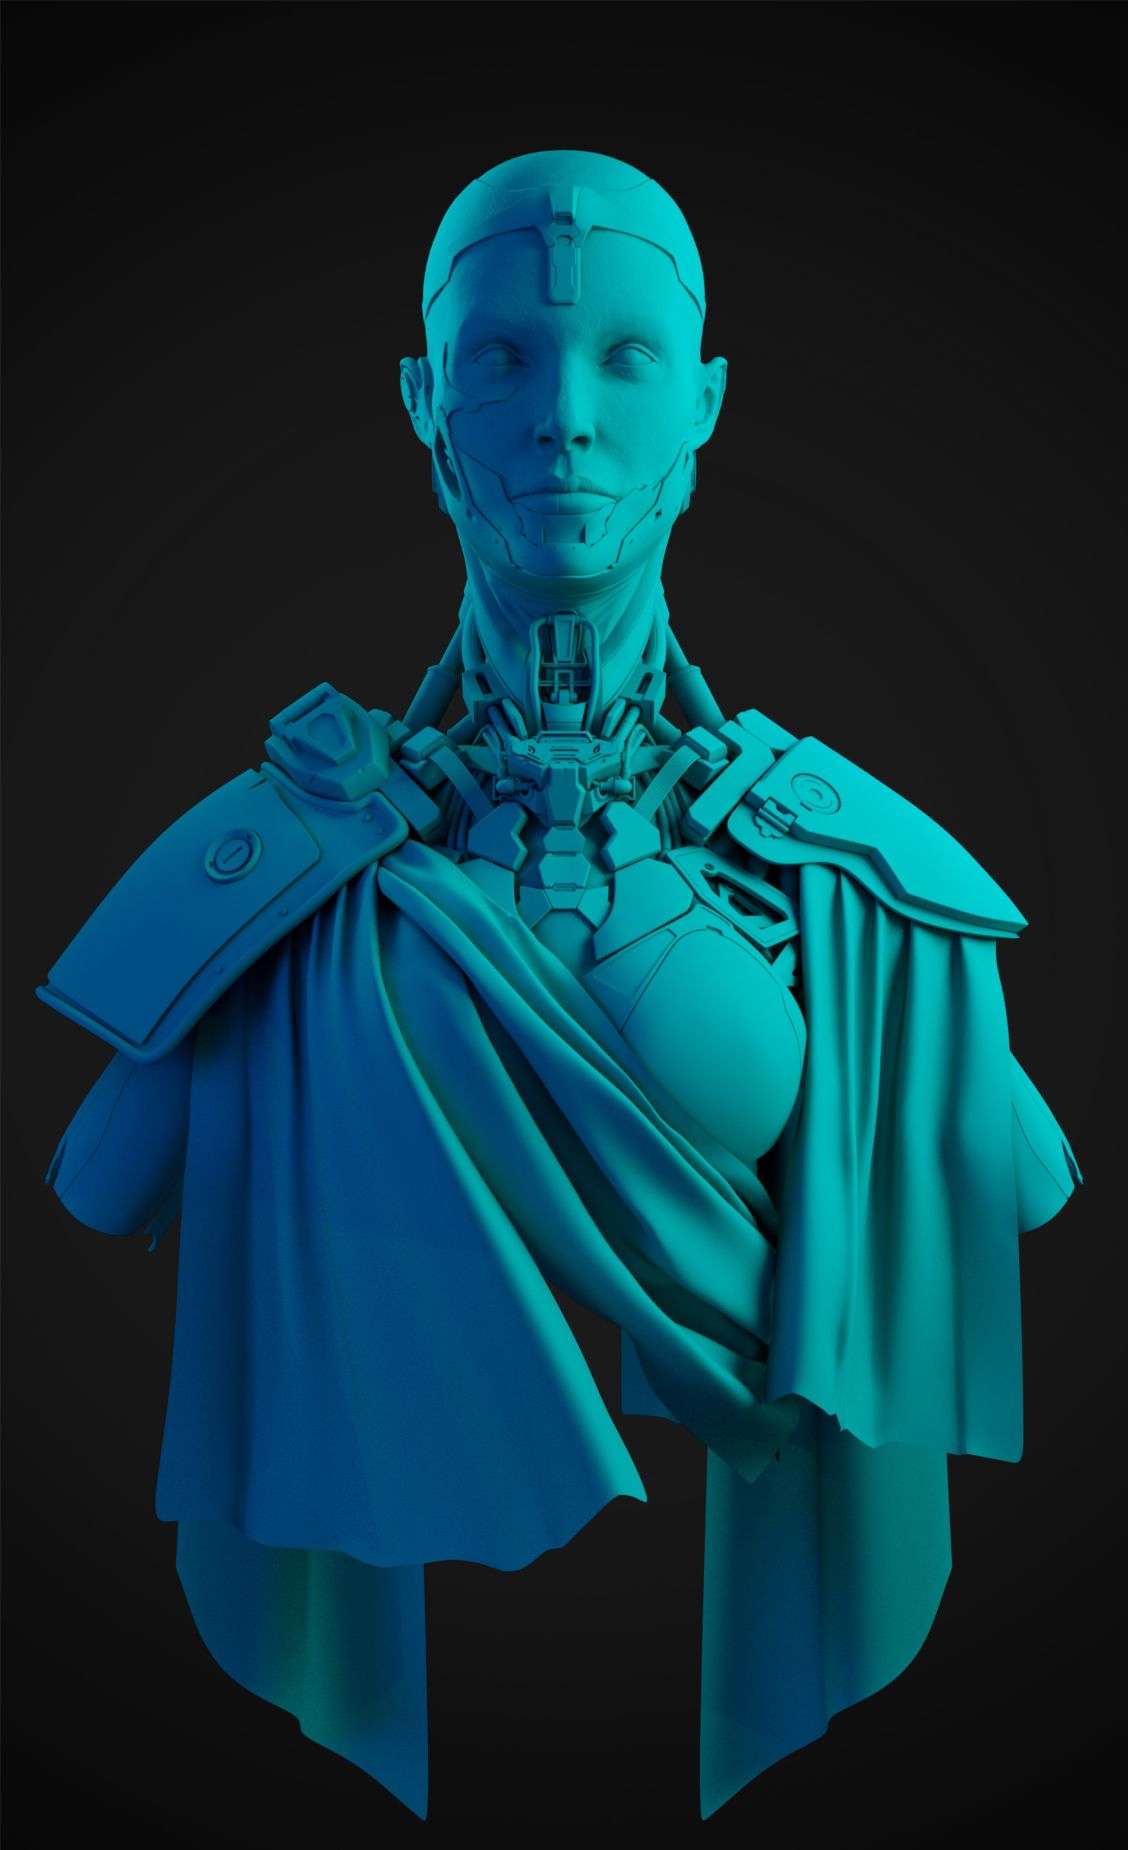
Blocking In ZBrush
In ZBrush, I get-go blocking the whole model; organic, clothes and hard surface parts using Dynamish or Sculptris Pro Mode.
I start blocking out the large forms offset and so the small ones. Information technology is preferable to cake the organic-hard surface parts (metallic parts in her jaw, the crown on her head, chest and shoulder pieces) equally clean as possible considering I will use this geometry in the retopology process and the more they are make clean the better issue I will have.
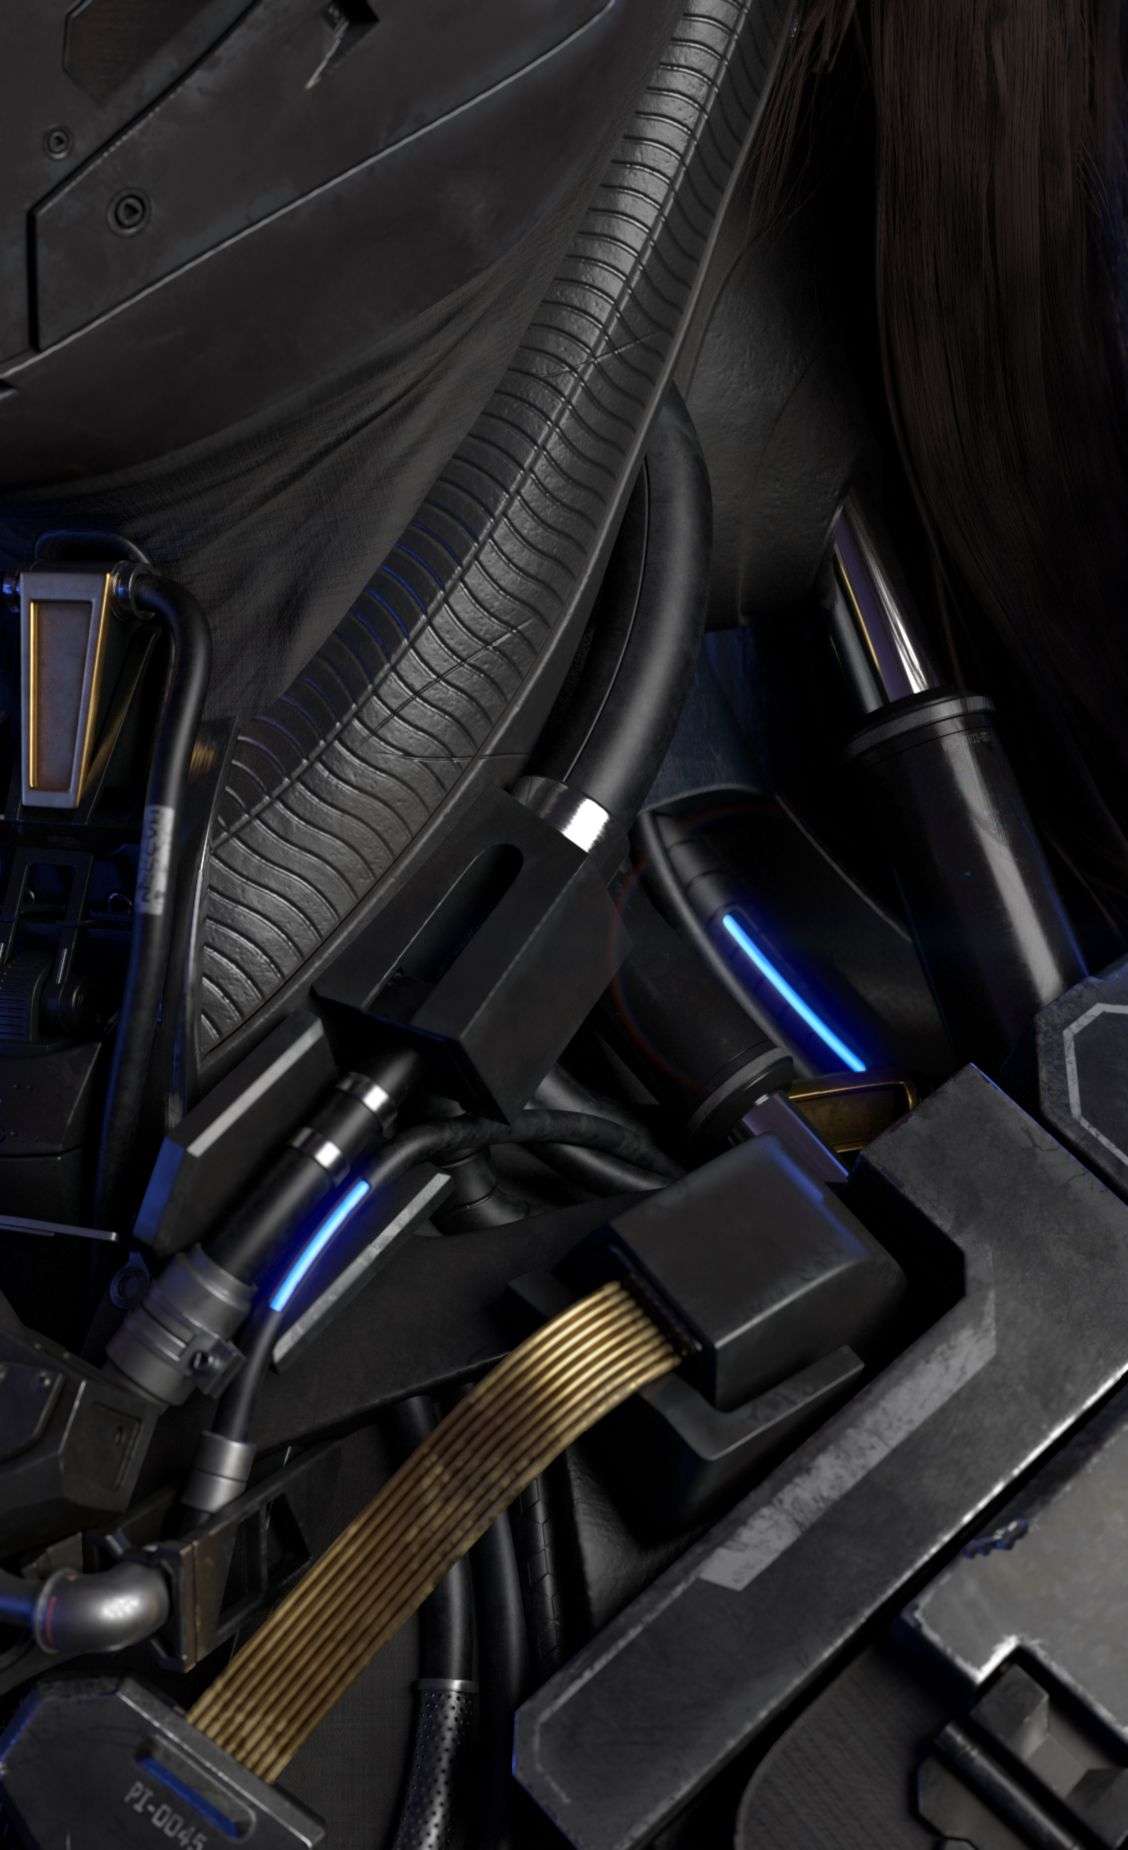
The wires, cables, and pistons I but block them using archaic shapes and snap to bend Brush in ZBrush because it is easier for me to model and add details to them in Maya after.
Retopology
I import the model and starting time doing retopology in Maya. I use a technique that I learned from my friend Nicolò Granese. I exercise a retopology for each piece individually, then I apply crease for the desired edges where volition be a hard edge, later subdivide the piece, finally, I chamfer the creased edges.
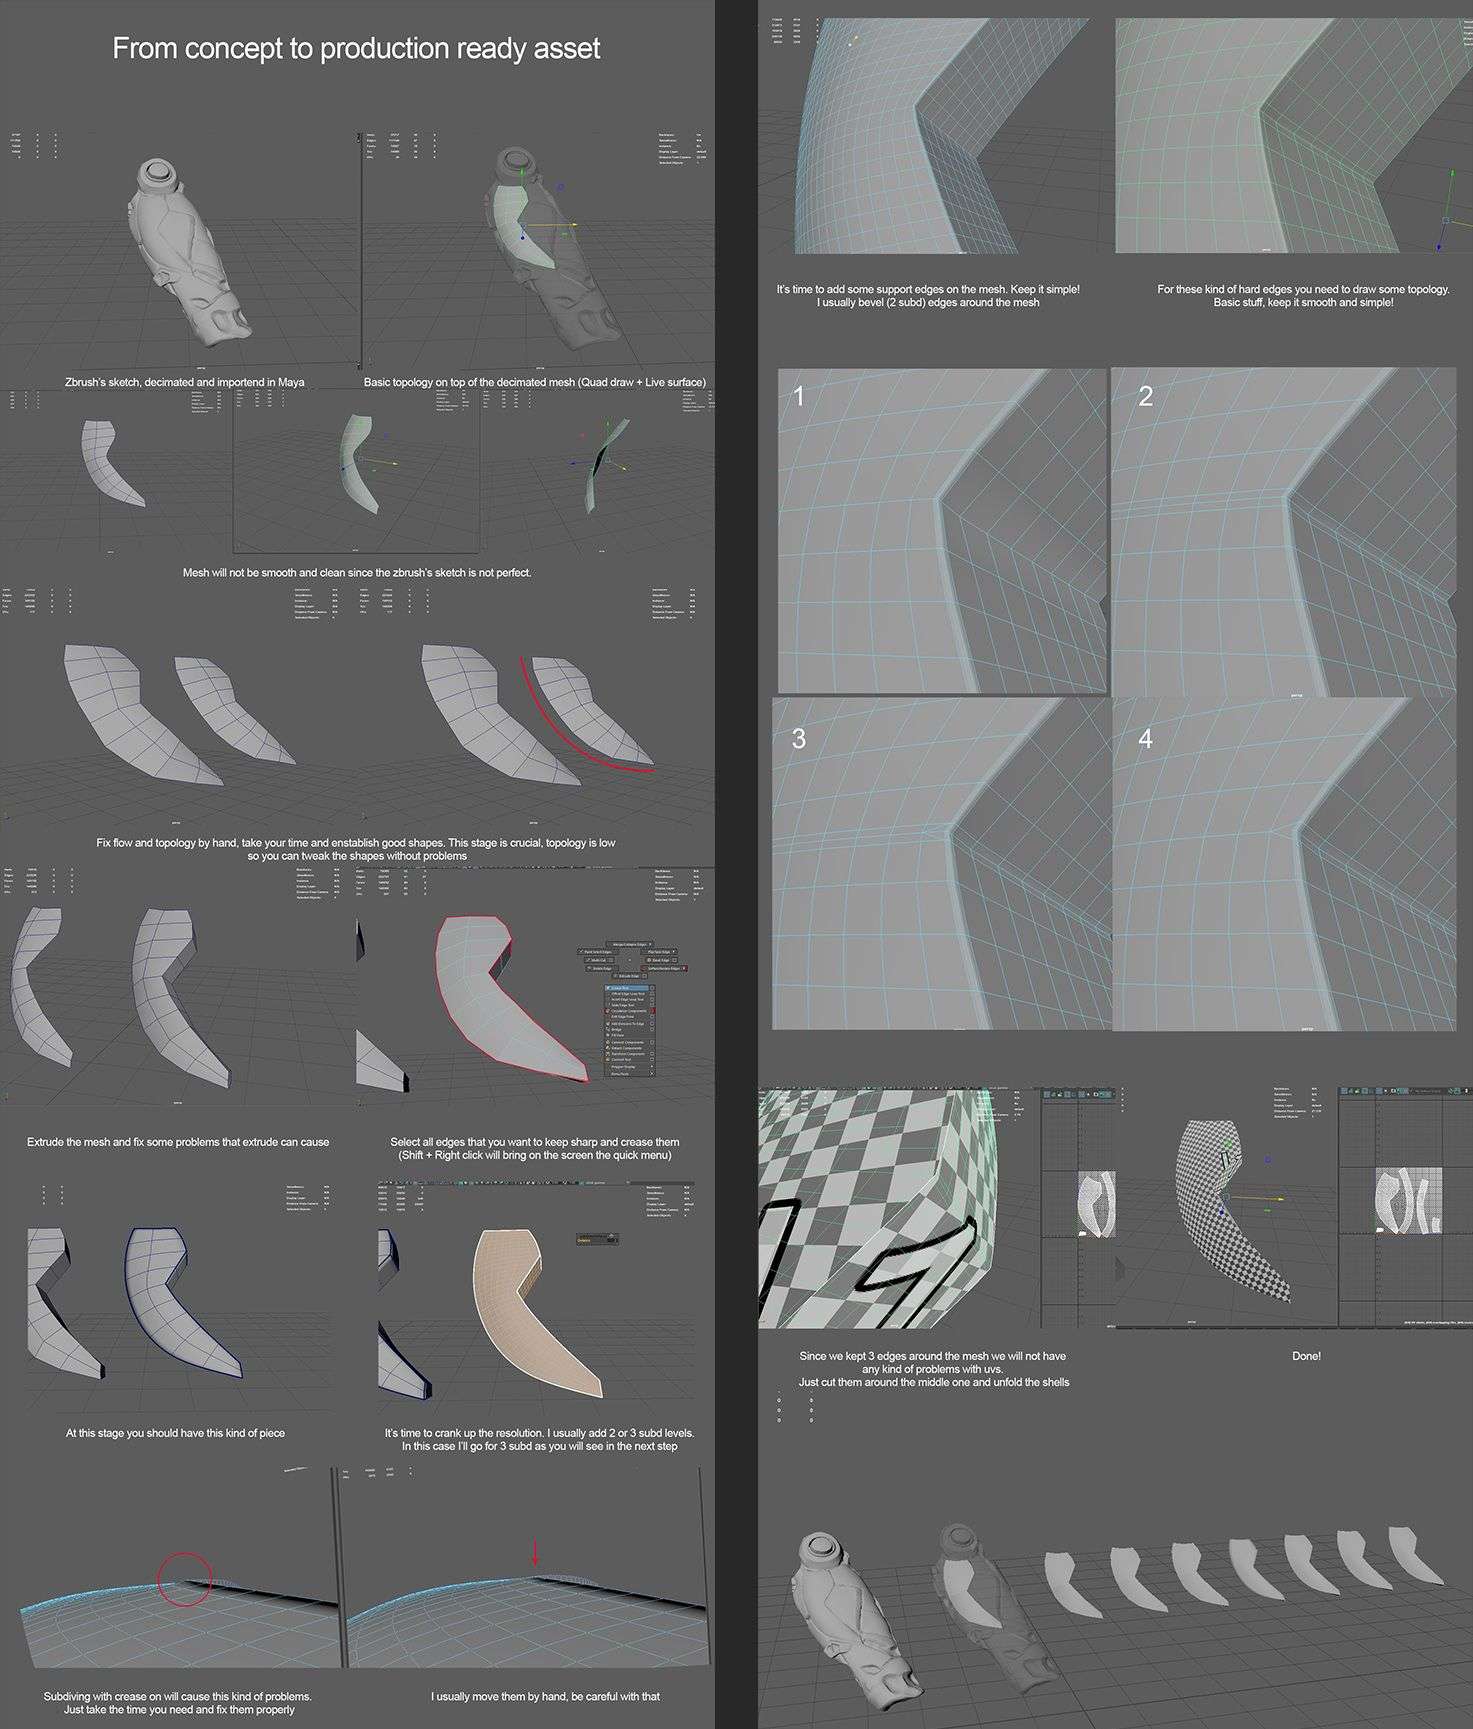
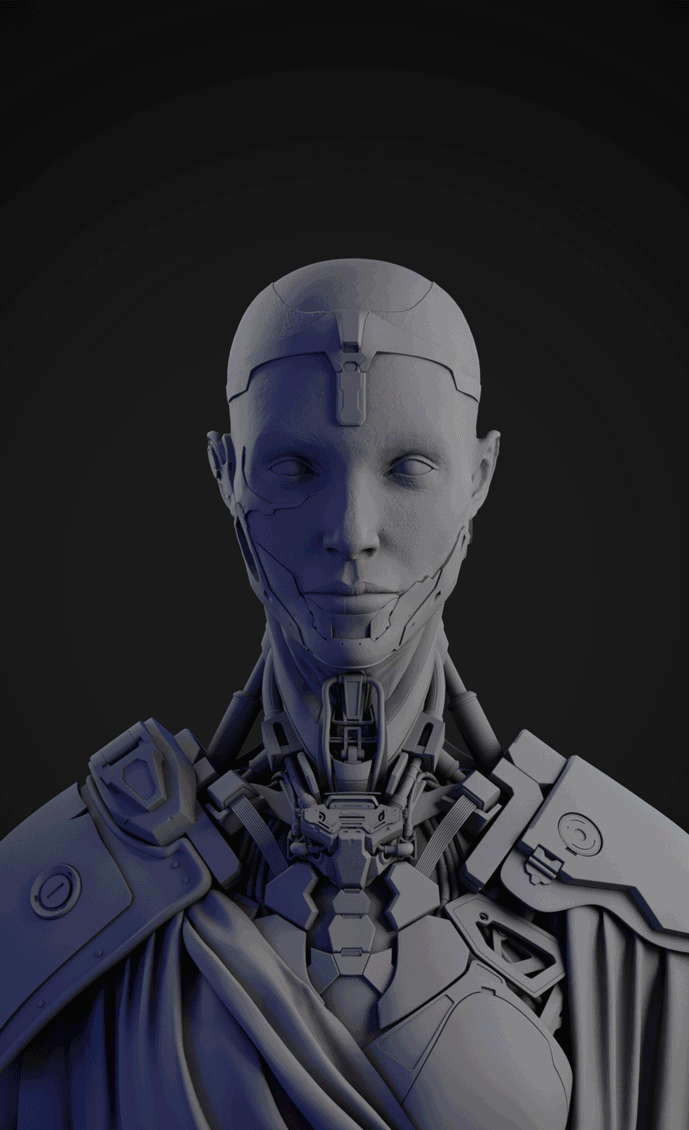
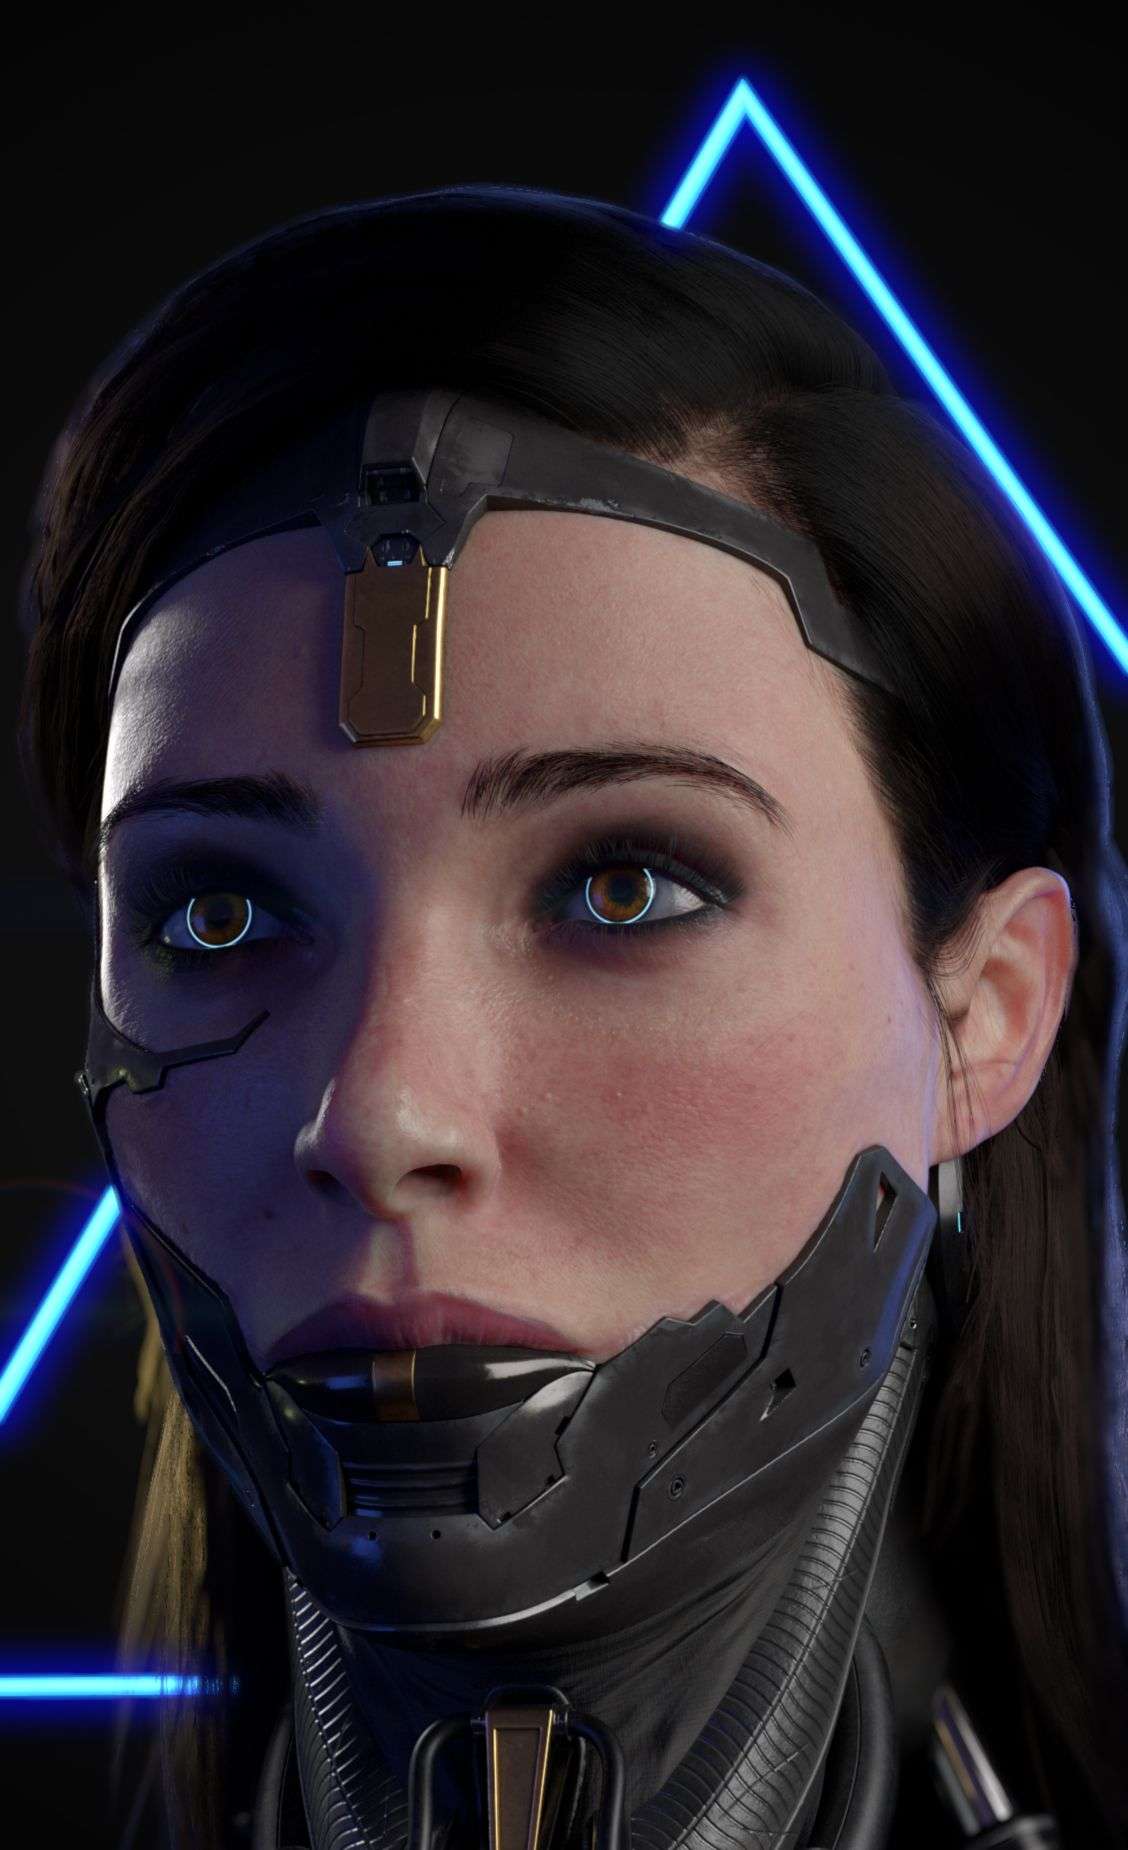
Modeling The Head
In this part, I starting time sculpting the head trying to friction match the reference I have.
After that, I used the XYZ multichannel maps from Texturingxyz. In add-on to the astonishing maps and textures they have. They also have slap-up tutorials and case studies that helped me a lot.
After that, I used the XYZ multichannel maps from Texturingxyz. In addition to the amazing maps and textures they take. They as well have great tutorials and example studies that helped me a lot.I used Zwrap to utilize the displacement on my model by following this killer workflow. I tend to apply a large breakup noise from ZBrush every bit the kickoff layer of the skin then import the displacement maps using this amazing UDIM Importer
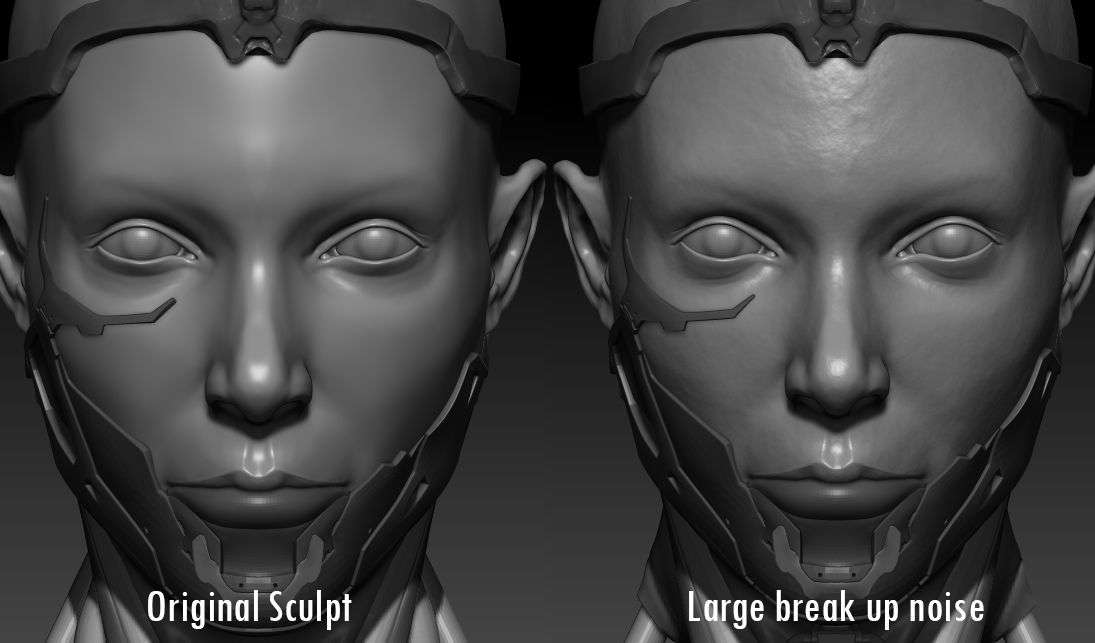
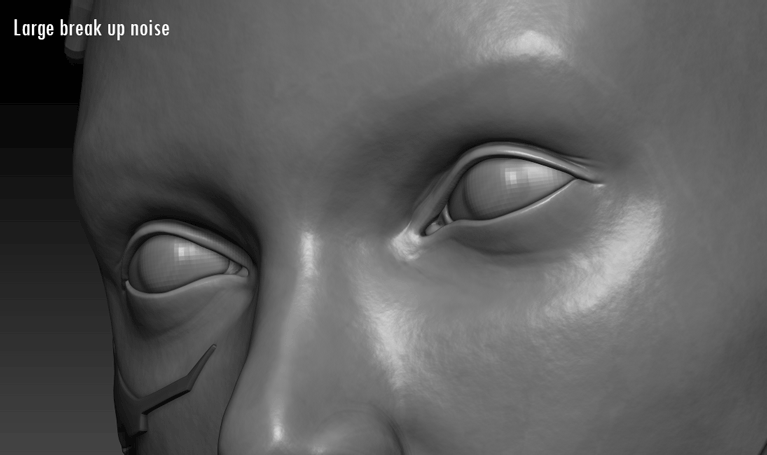
Then I start sculpting some wrinkles, pare folds and details in another layer. Finally, I start breaking the symmetry in my model in a third layer.

Note: When exporting the Deportation maps, information technology is better to export the XYZ fine details and the sculpted details separated in different displacement maps so that u can command the amount of both details separately. Otherwise, the details might seem at the aforementioned level which is not accurate.
Modeling Caput Surface Parts
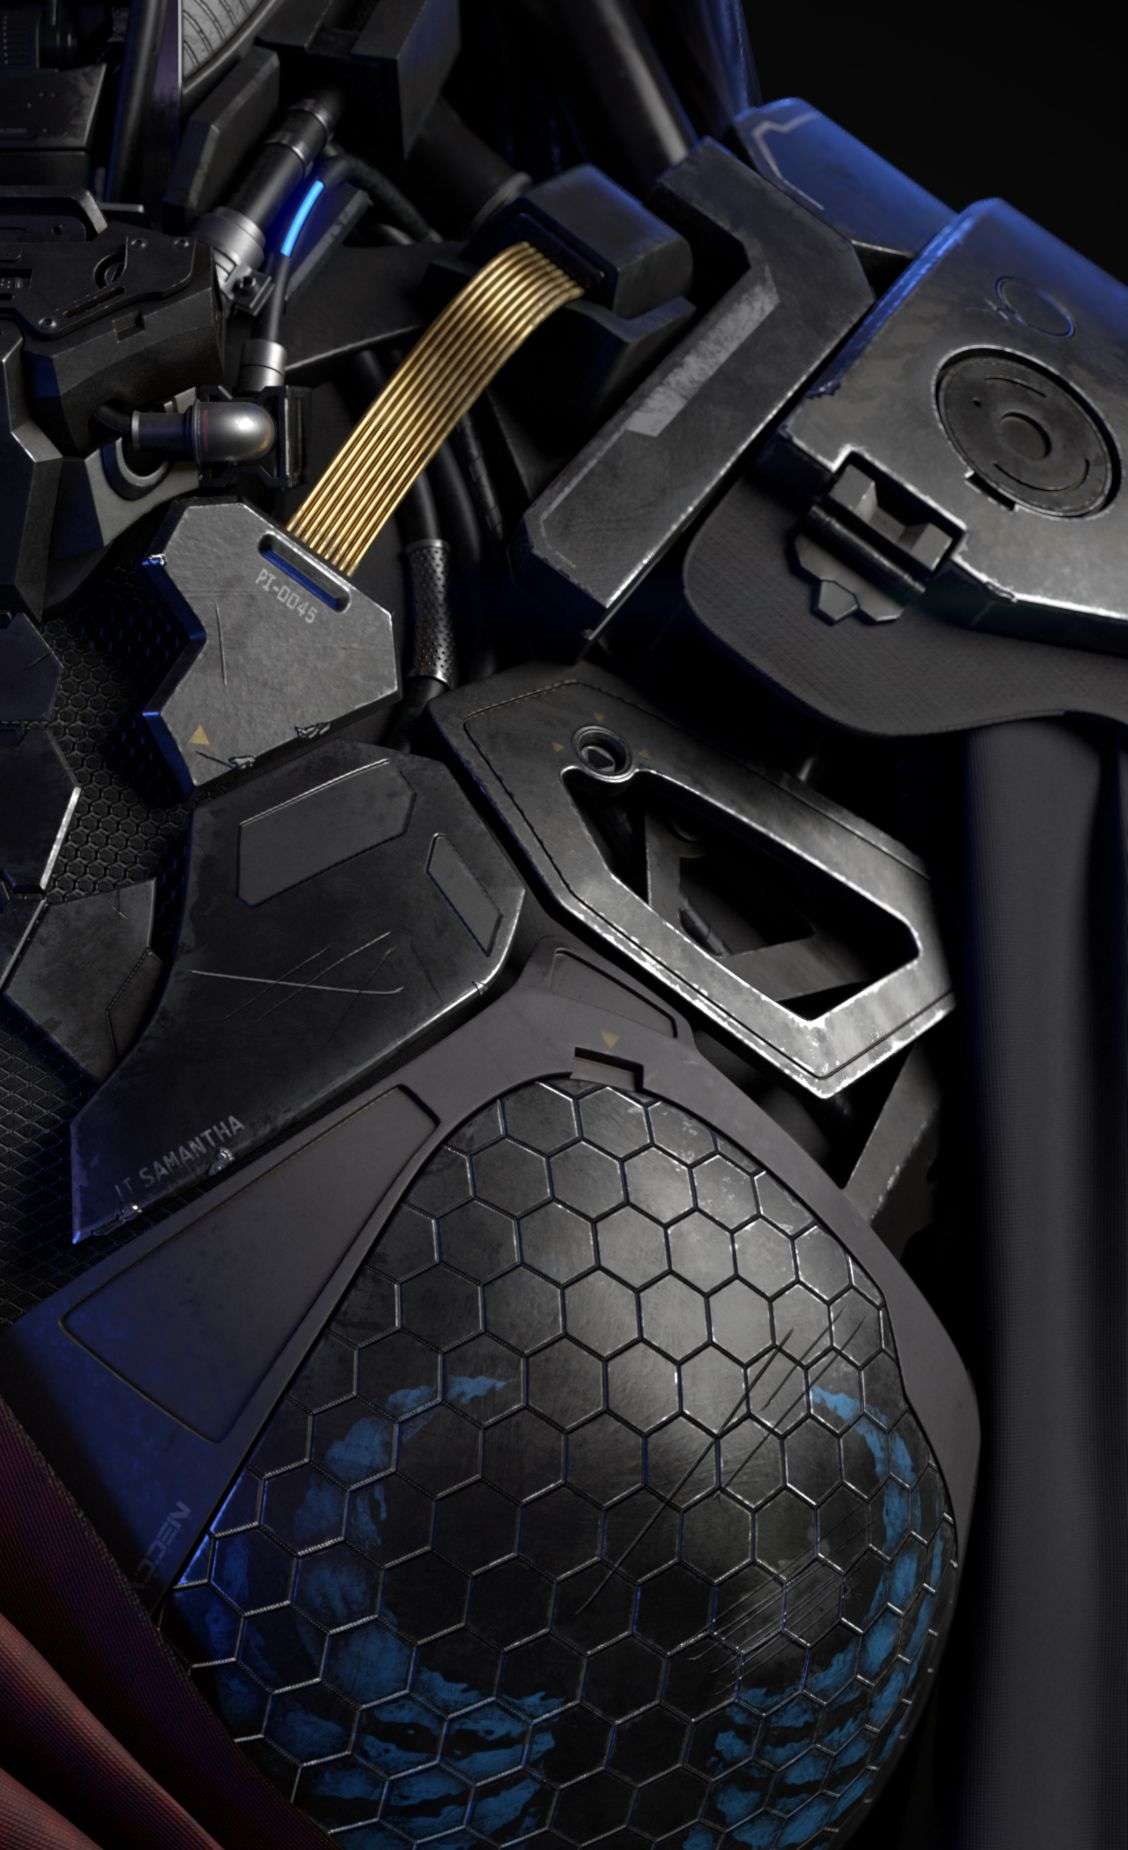
This is my last touches on the model. I utilise SPline to model the cables, I utilise my own generic kitbash to fill the gaps in the model and at the tiny details similar screws, cablevision heads, structural parts, and small pistons.
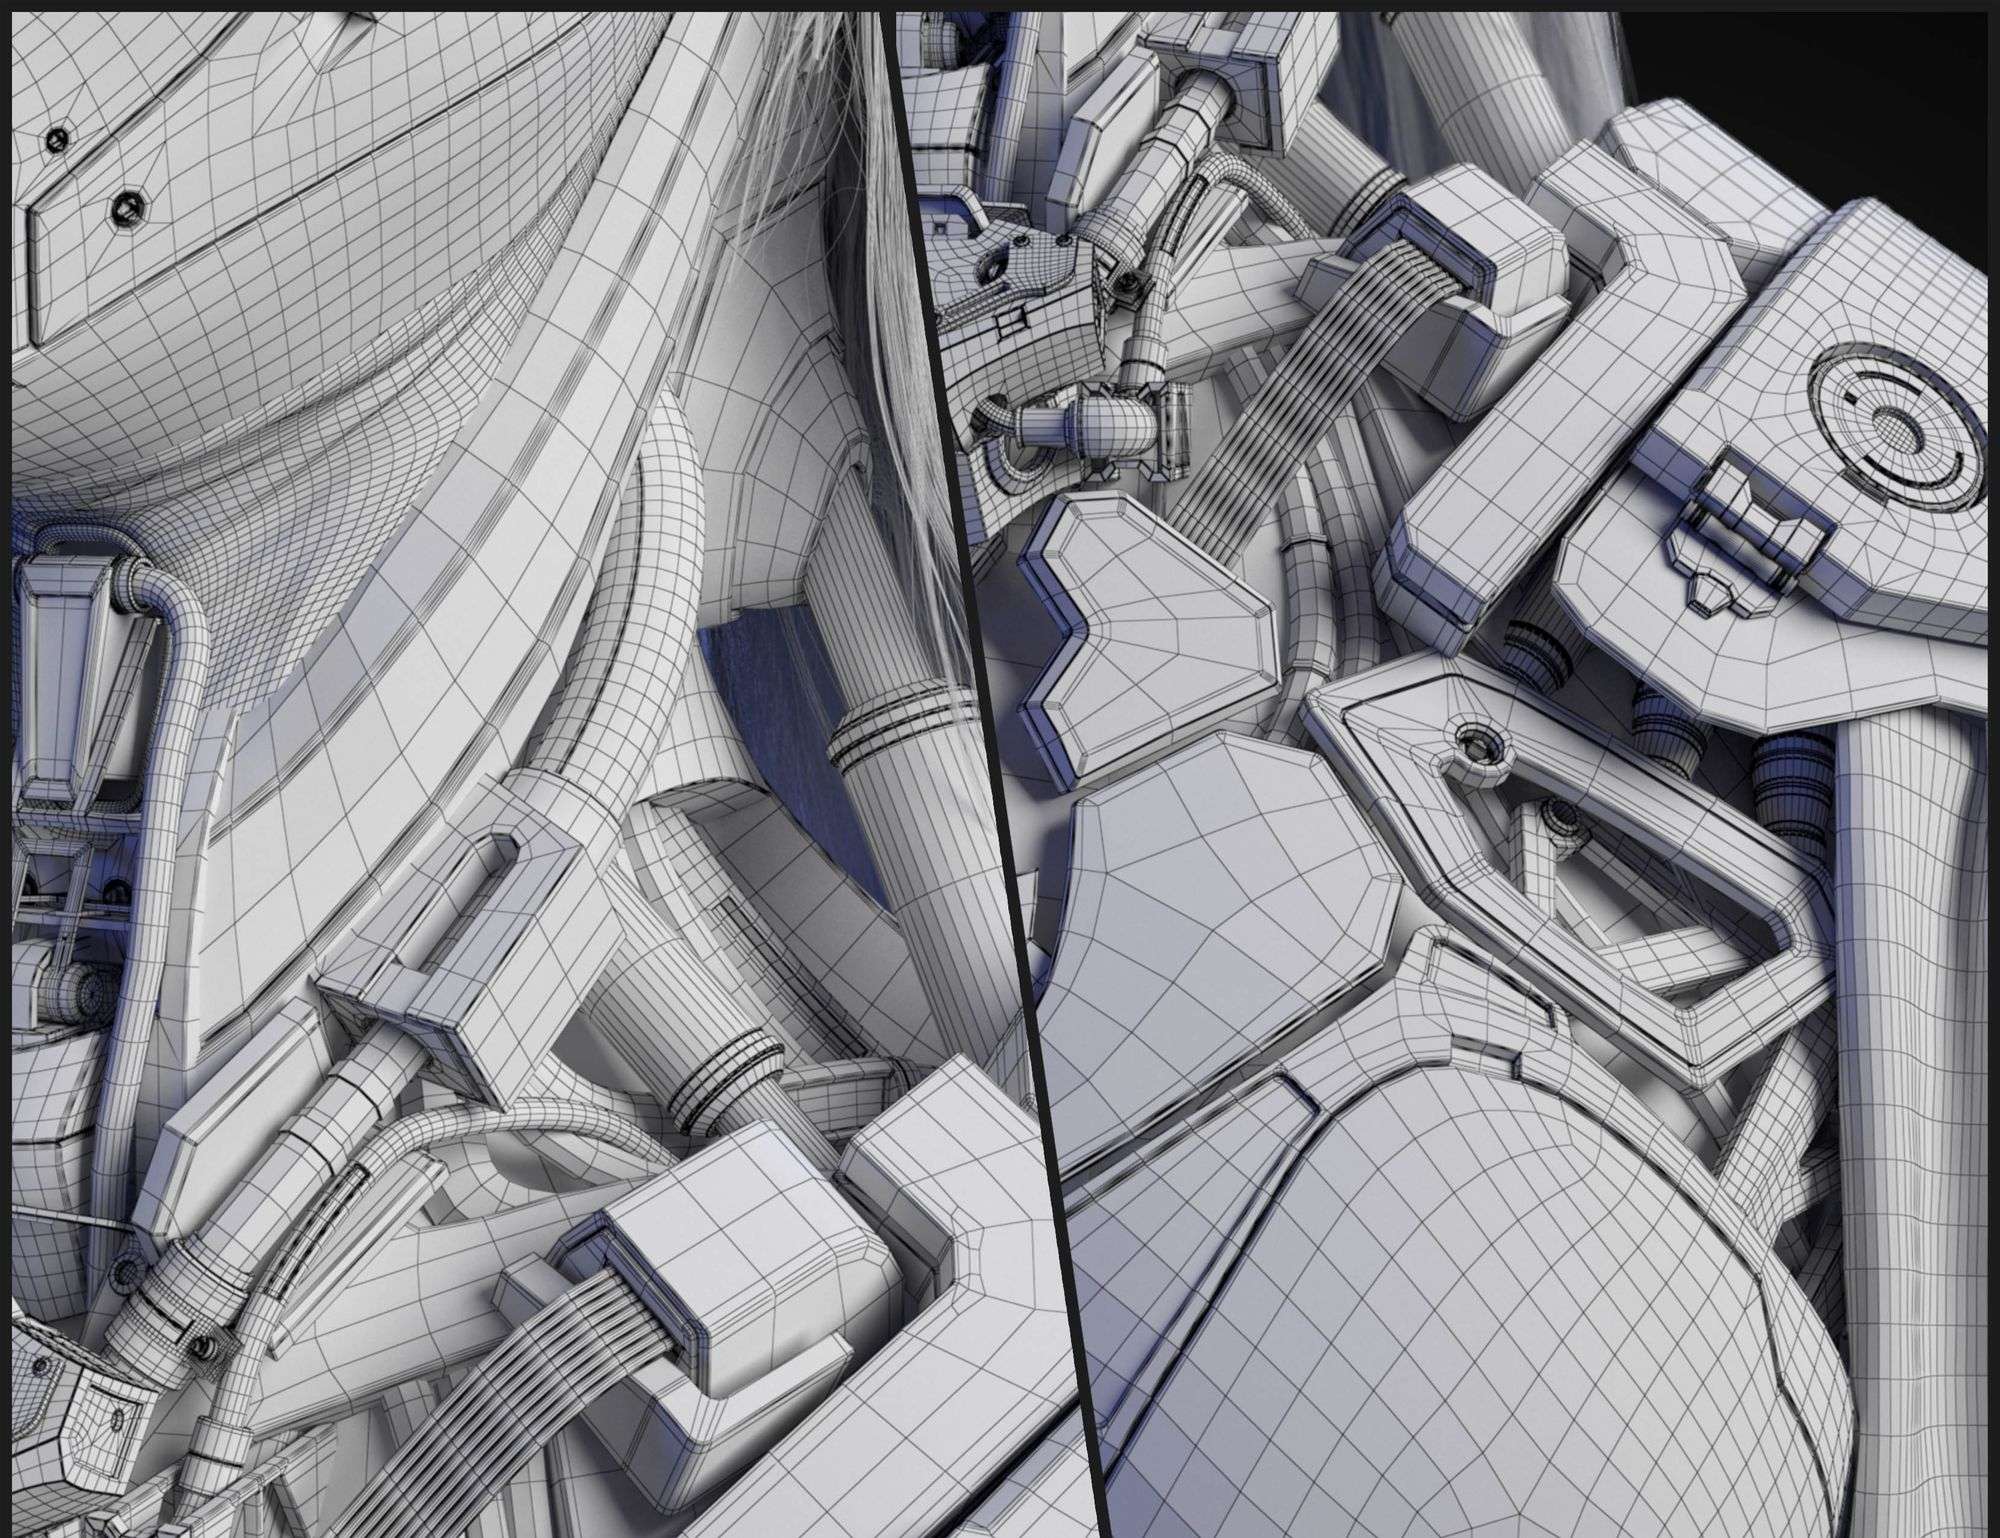
Note: it is highly recommended that you start building your own kitbash if y'all are doing a hard surface model it will make life much easier and faster and proficient looking results too. I continue a separate file with all the kitbash I did to re-import it and apply information technology in another project.
By this stage, I start to remember almost interesting parts and good-looking angels in my model where I might put my cameras.to first enhancing and pushing them furthermore and to make up one's mind which details should be modeled and others that I might use equally normal in the texturing phase.
Arranging the Scene in Maya
Ever remember to arrange the scene and rename the objects correctly before it gets much more crowded. I learned to separate my project into three main groups; Left, Correct, and Middle. As well, I make a group for the cameras and another ane for my initial lights.
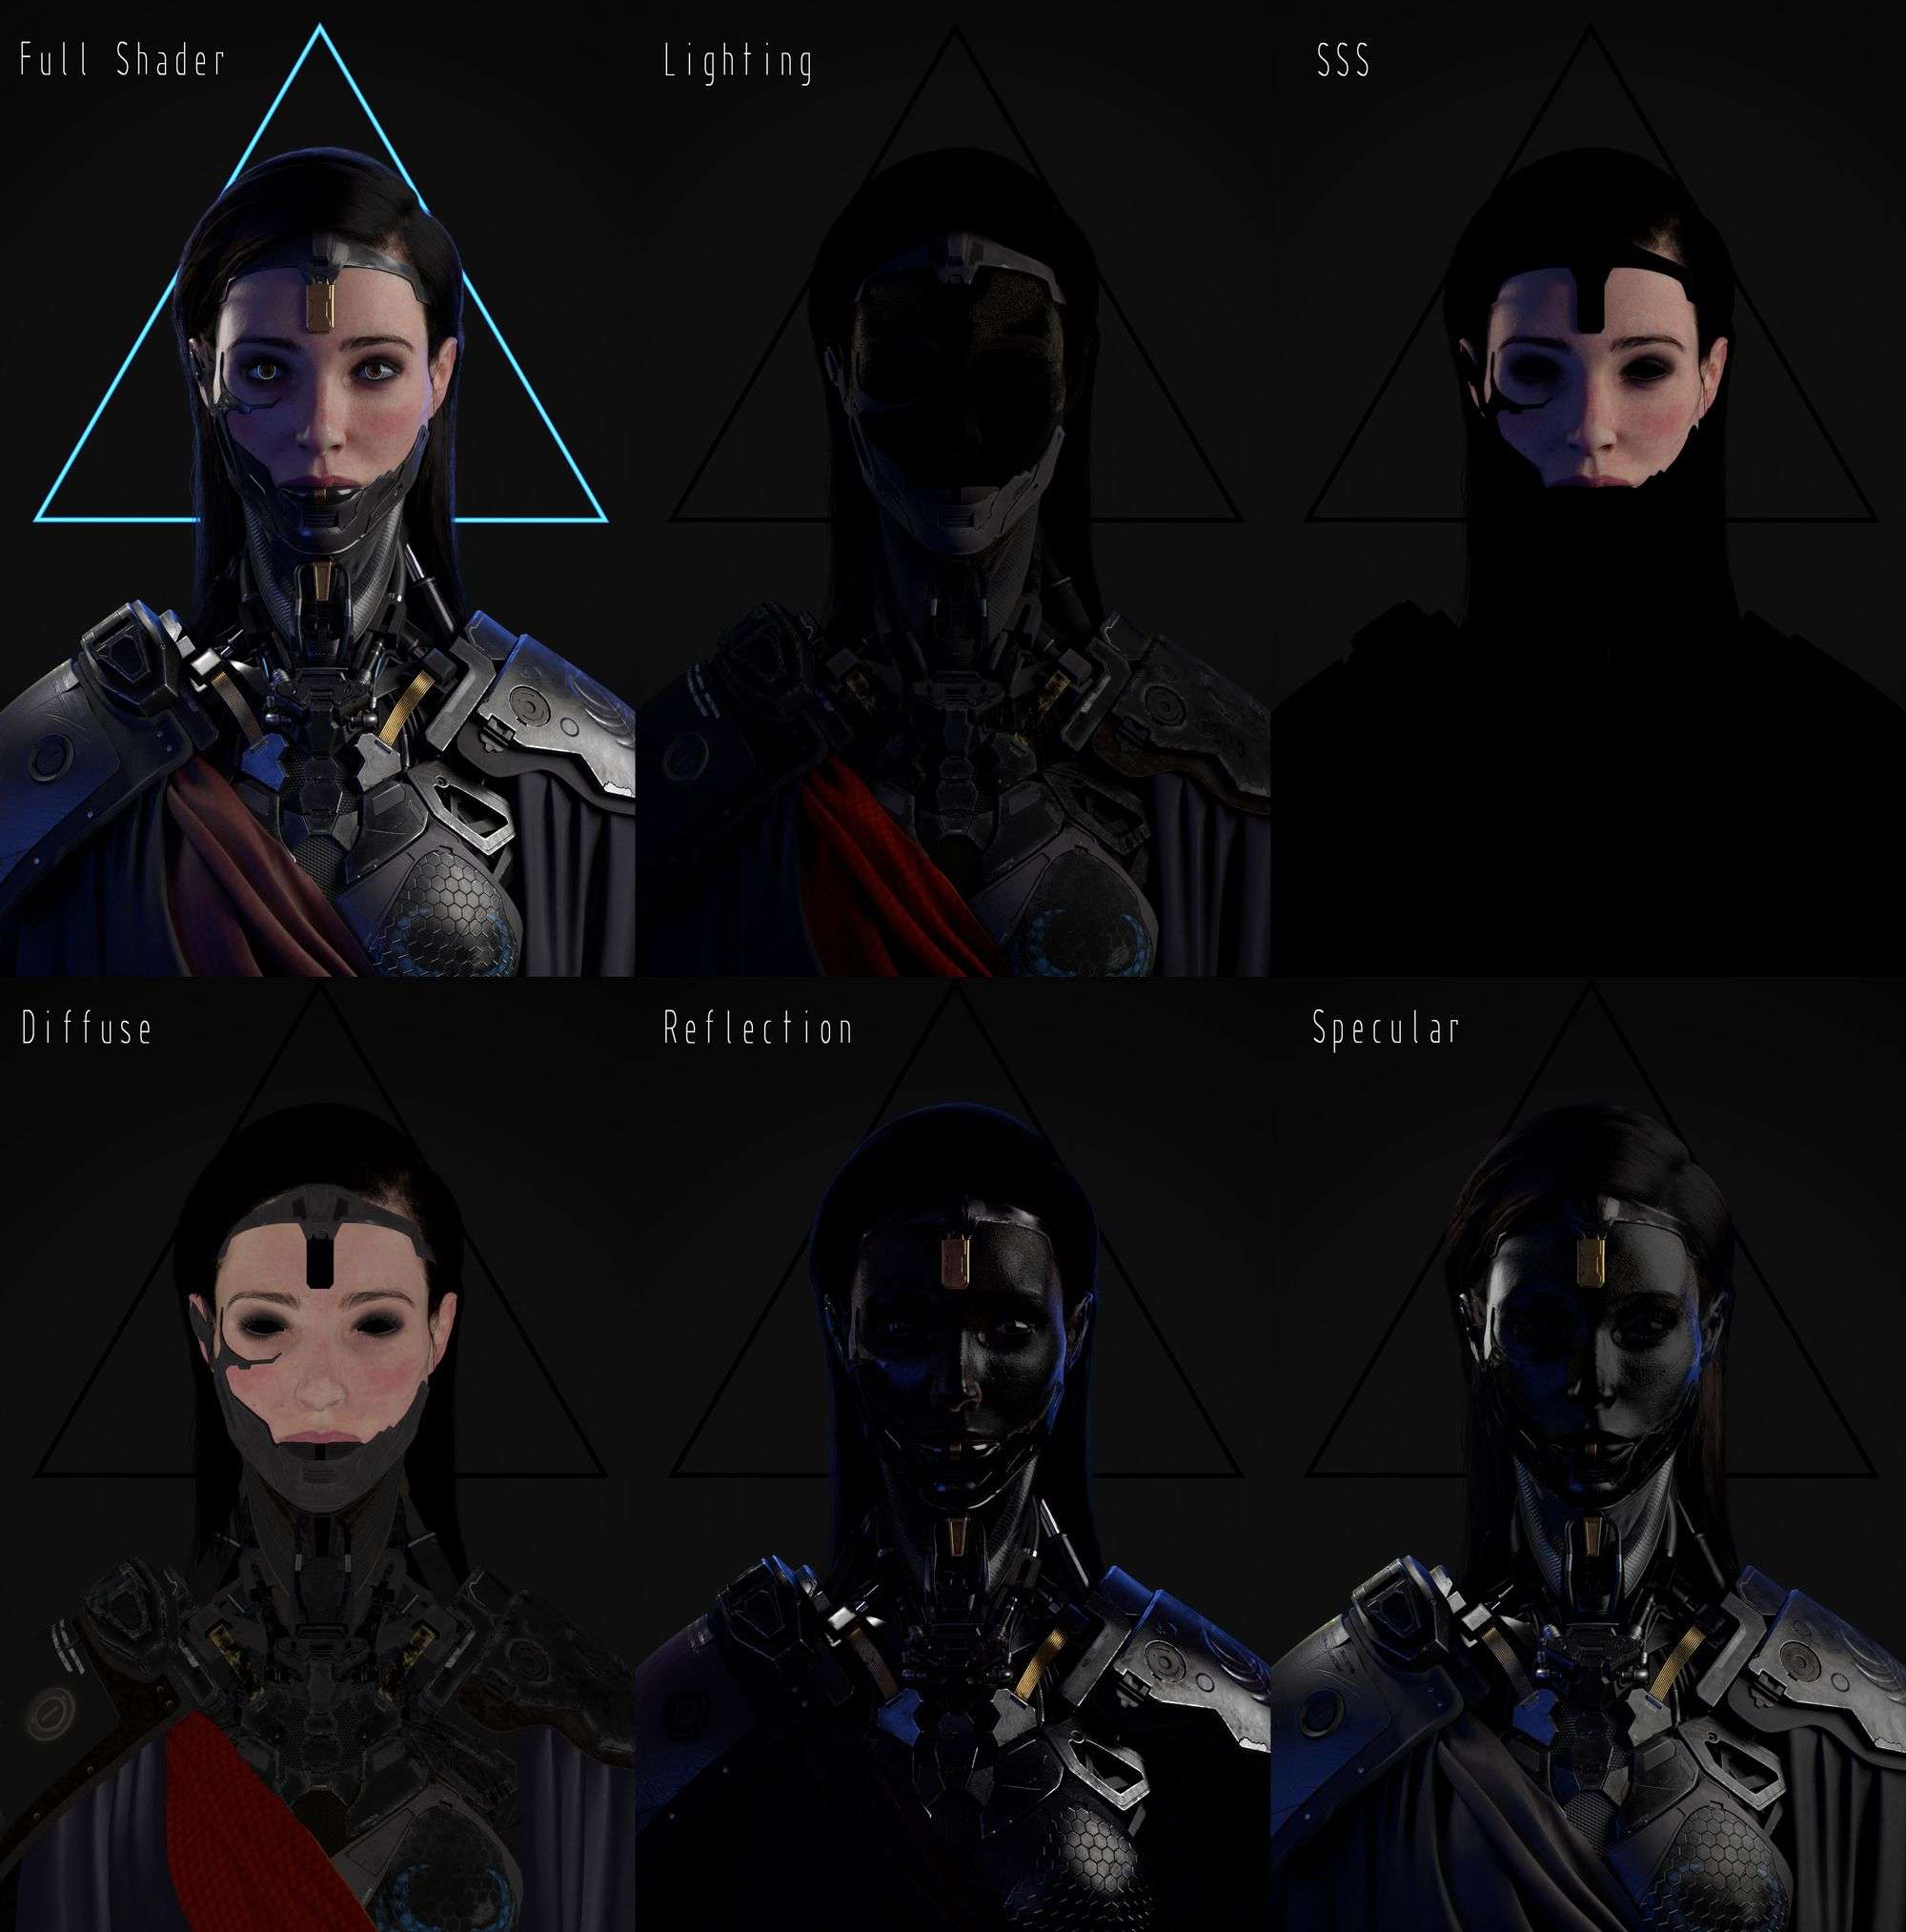
Texturing The Body
I mainly prefer to utilise Substance Painter for texturing the difficult surface models. I find information technology much easier and faster in terms of painting all the maps together (diff, spec, gloss, bump )
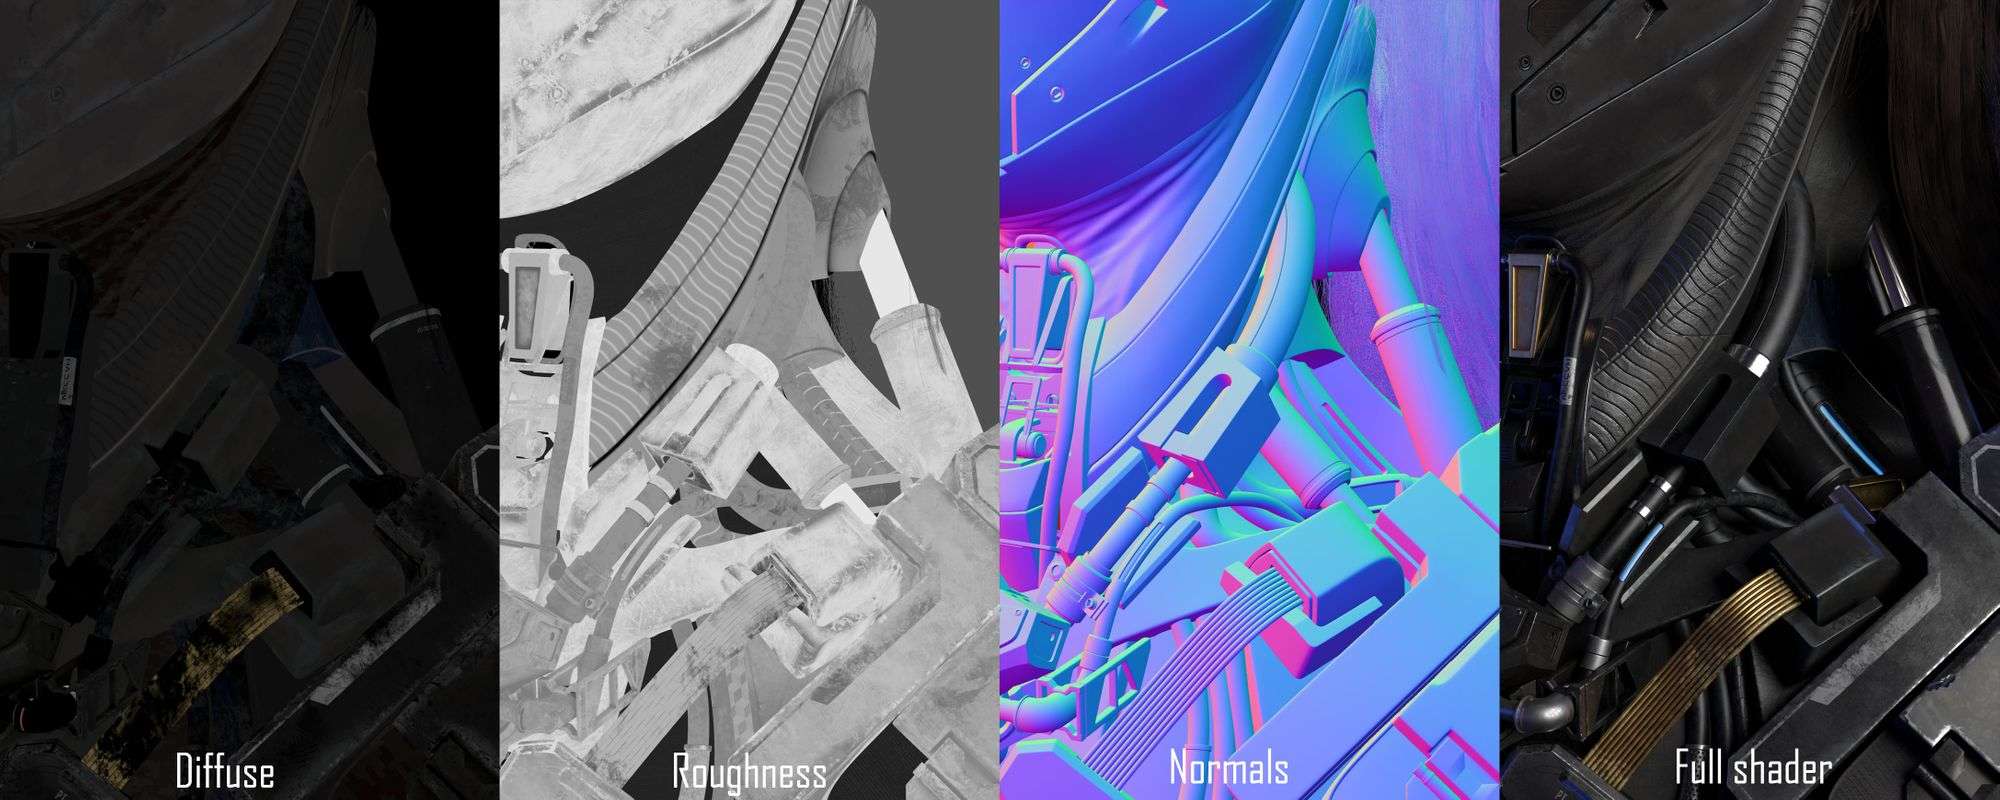
But before jumping into Substance I tend to utilize basic shaders within Maya and settle down my main color palette. Some times a grab a picture that I love its color palette and use Adobe colour wheel to excerpt its Raw colors and use them in my model.
Here is a listing of tips I use while texturing.
-
Reference, reference, and reference.
I always tend to find references for the material I desire to apply. And clarify it in terms of color variation, roughness, and wear.
-
Color variation
I adopt to use two to three degrees of the aforementioned color to give information technology a variation, and it depends on the level of wear and the number of scratches.
-
Anchor points
I utilise ballast points technique so that the newly added details got the same effect of scratches and wear as the modeled one.
Skin
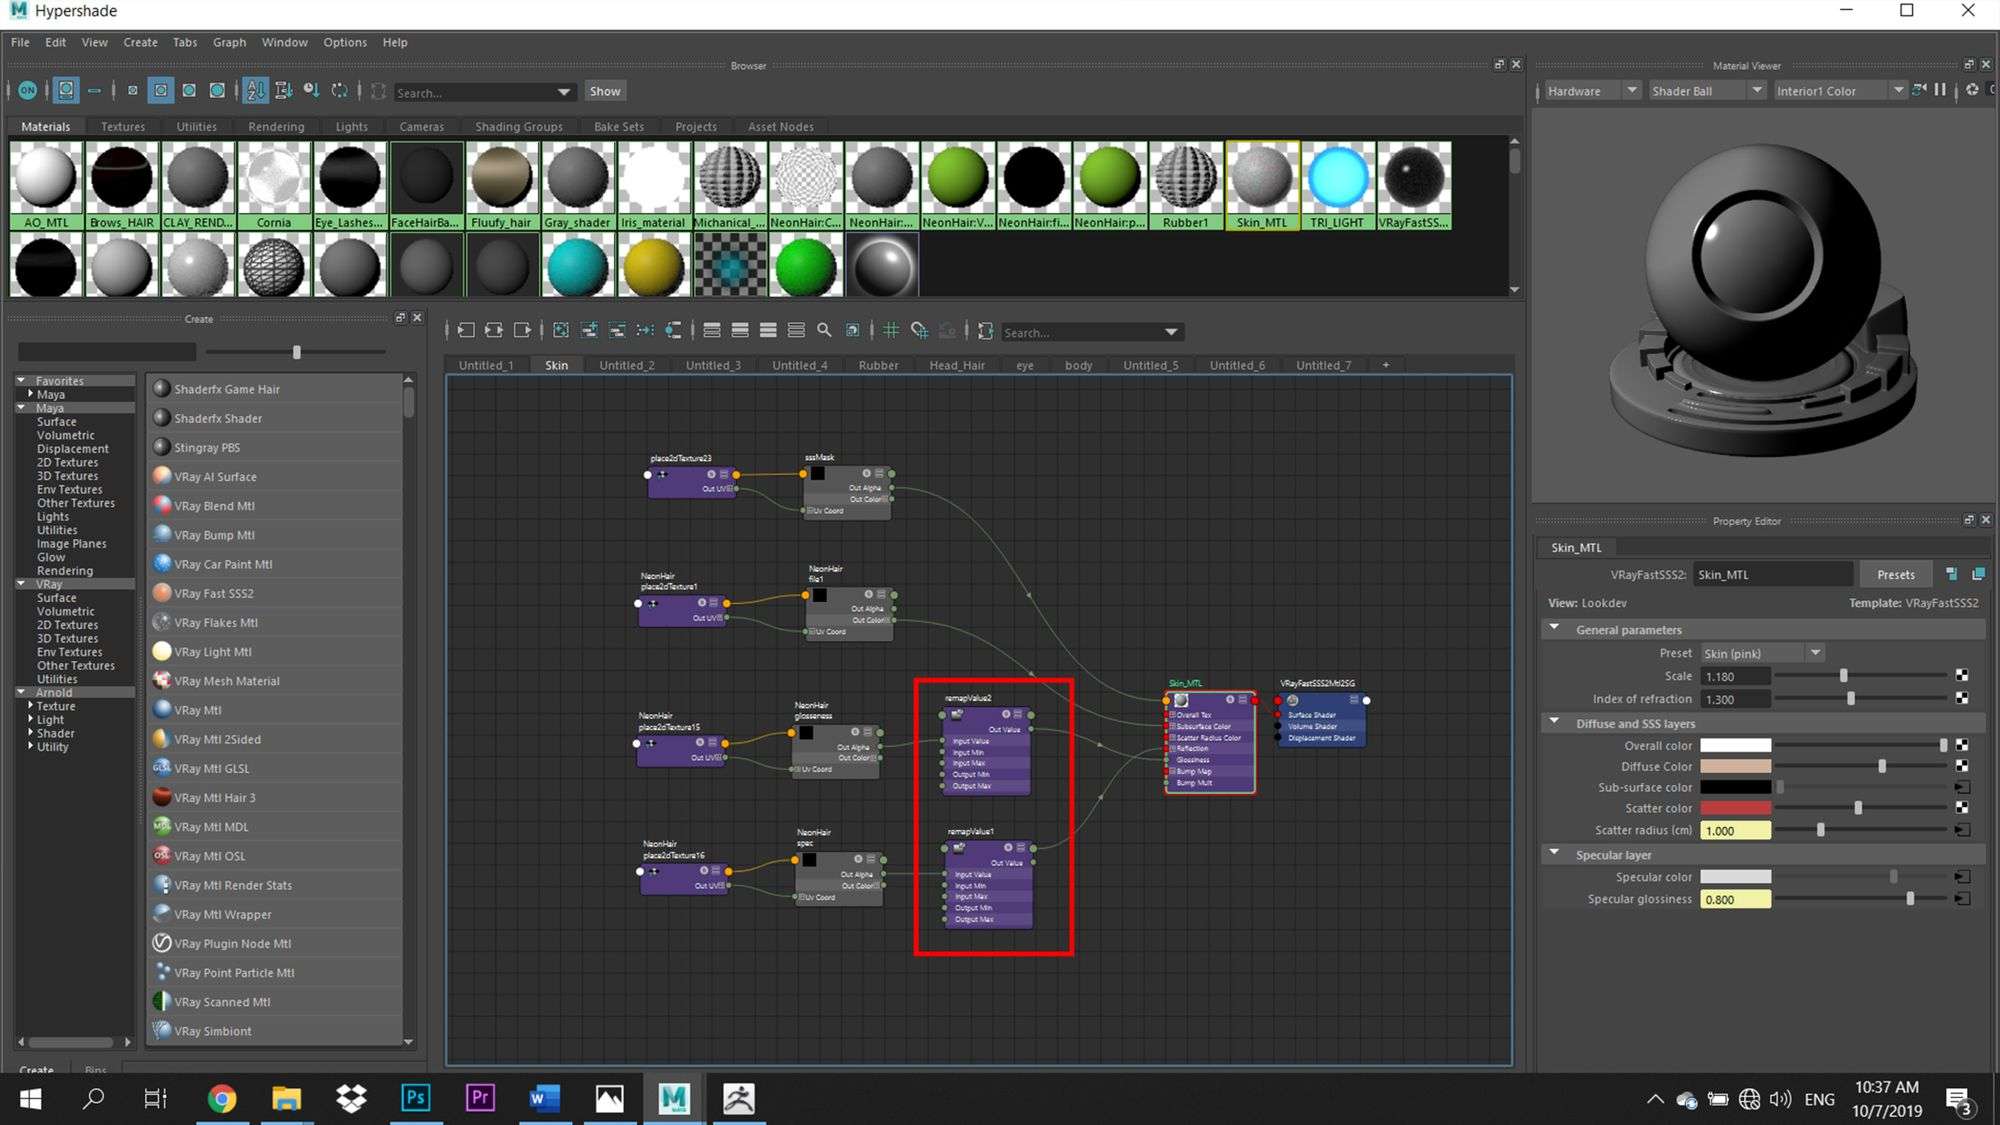
For the skin, I utilize XYZ Multichannel maps. I used Zwrap again to employ the albedo/Diffuse map to my model using the aforementioned killer workflow. Afterwards that I use foundry Mari to fix some areas, enhancing some details and add makeup to my character. I besides paint the balance of the maps (specular, glossiness and SSS Mask) inside Mari
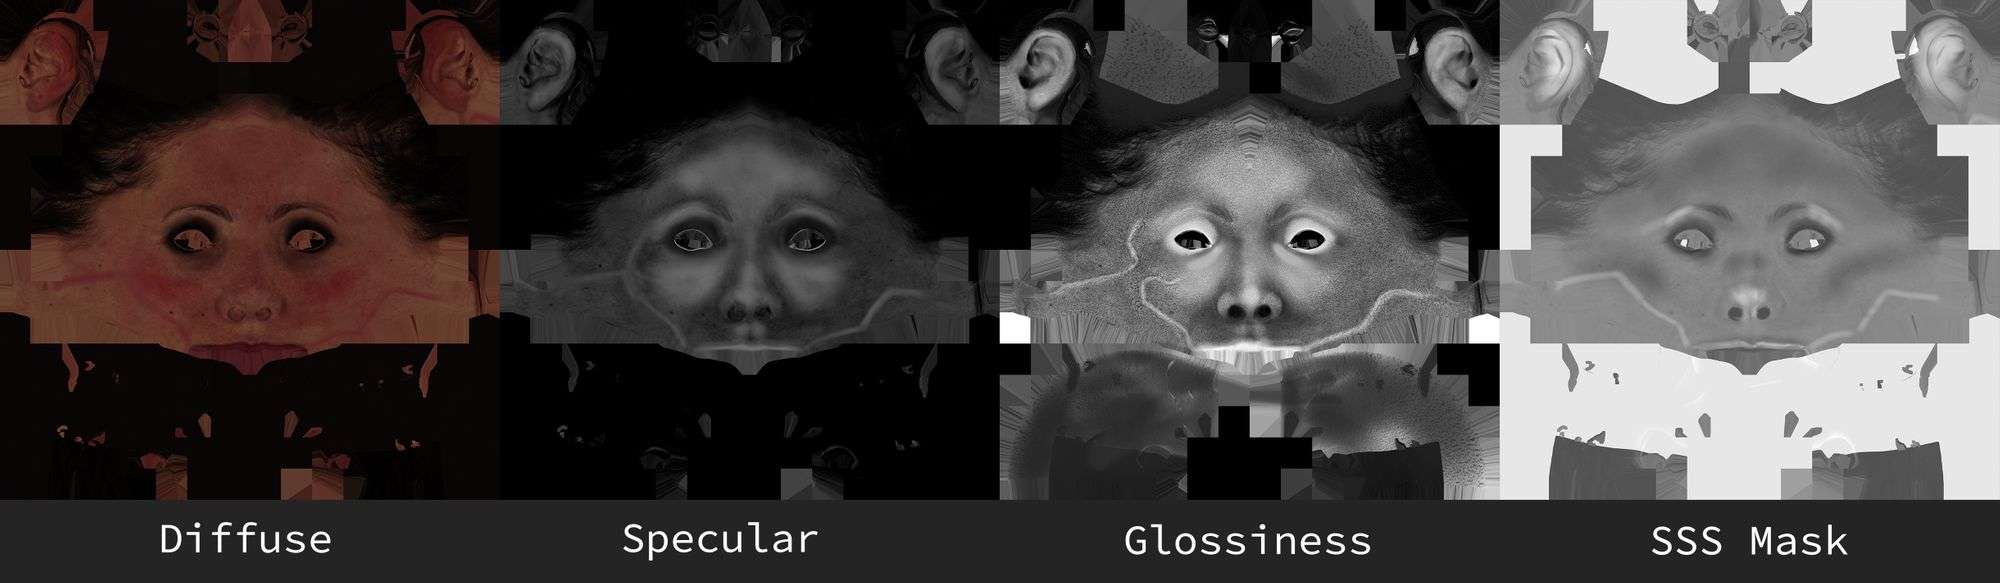
The specular and glossiness maps will demand some modification, and then I plug them into a remap node and beginning manipulating them until I got satisfied with the results. it is just a matter of trial and mistake.
Pilus
For the pilus, I used Xgen. I simply starting time drawing the guides and painting the density and mask maps. I prefer to split my hair into multiple descriptions to requite me ameliorate command.
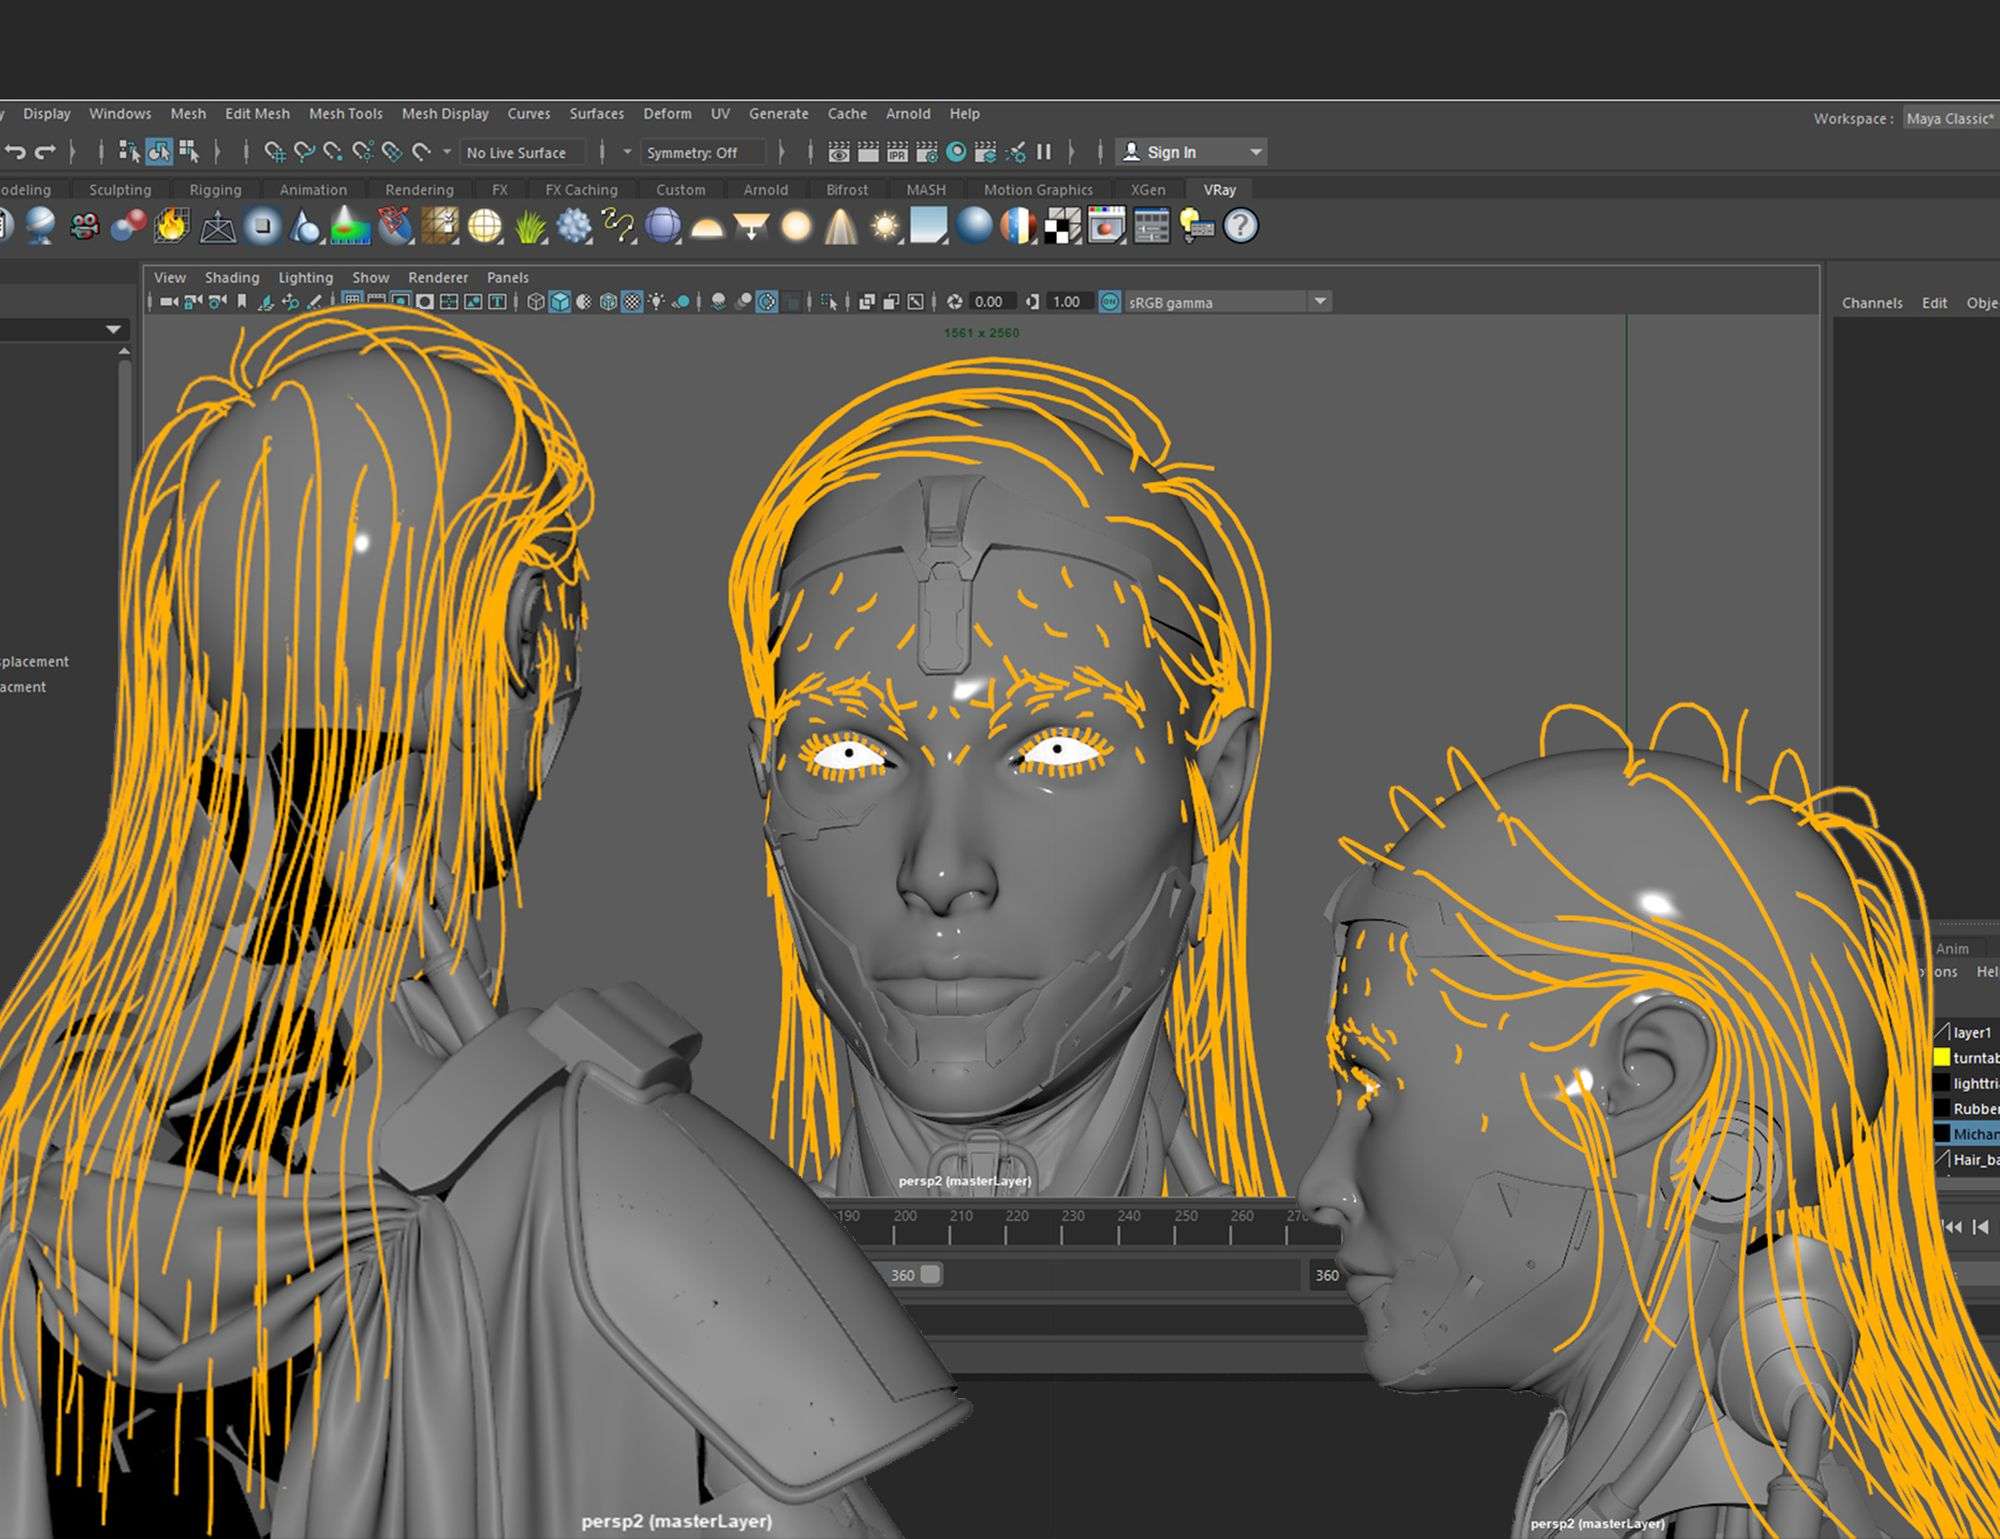
information technology was really difficult for me because it was my first fourth dimension and I had to learn by the difficult fashion I went through a lot of problems and sometimes I had to remake the hair but here are some full general notes about creating hair with Xgen.
- Ready the projection correctly and don't employ space or underscores or dots in the naming
- Make a scalp for the hair ( the mesh that the hair will grow from. You don't have to
- Utilize the collection for the whole model.
- UVS should be clean and in 0-1 infinite
- Don't delete the history of the pilus.
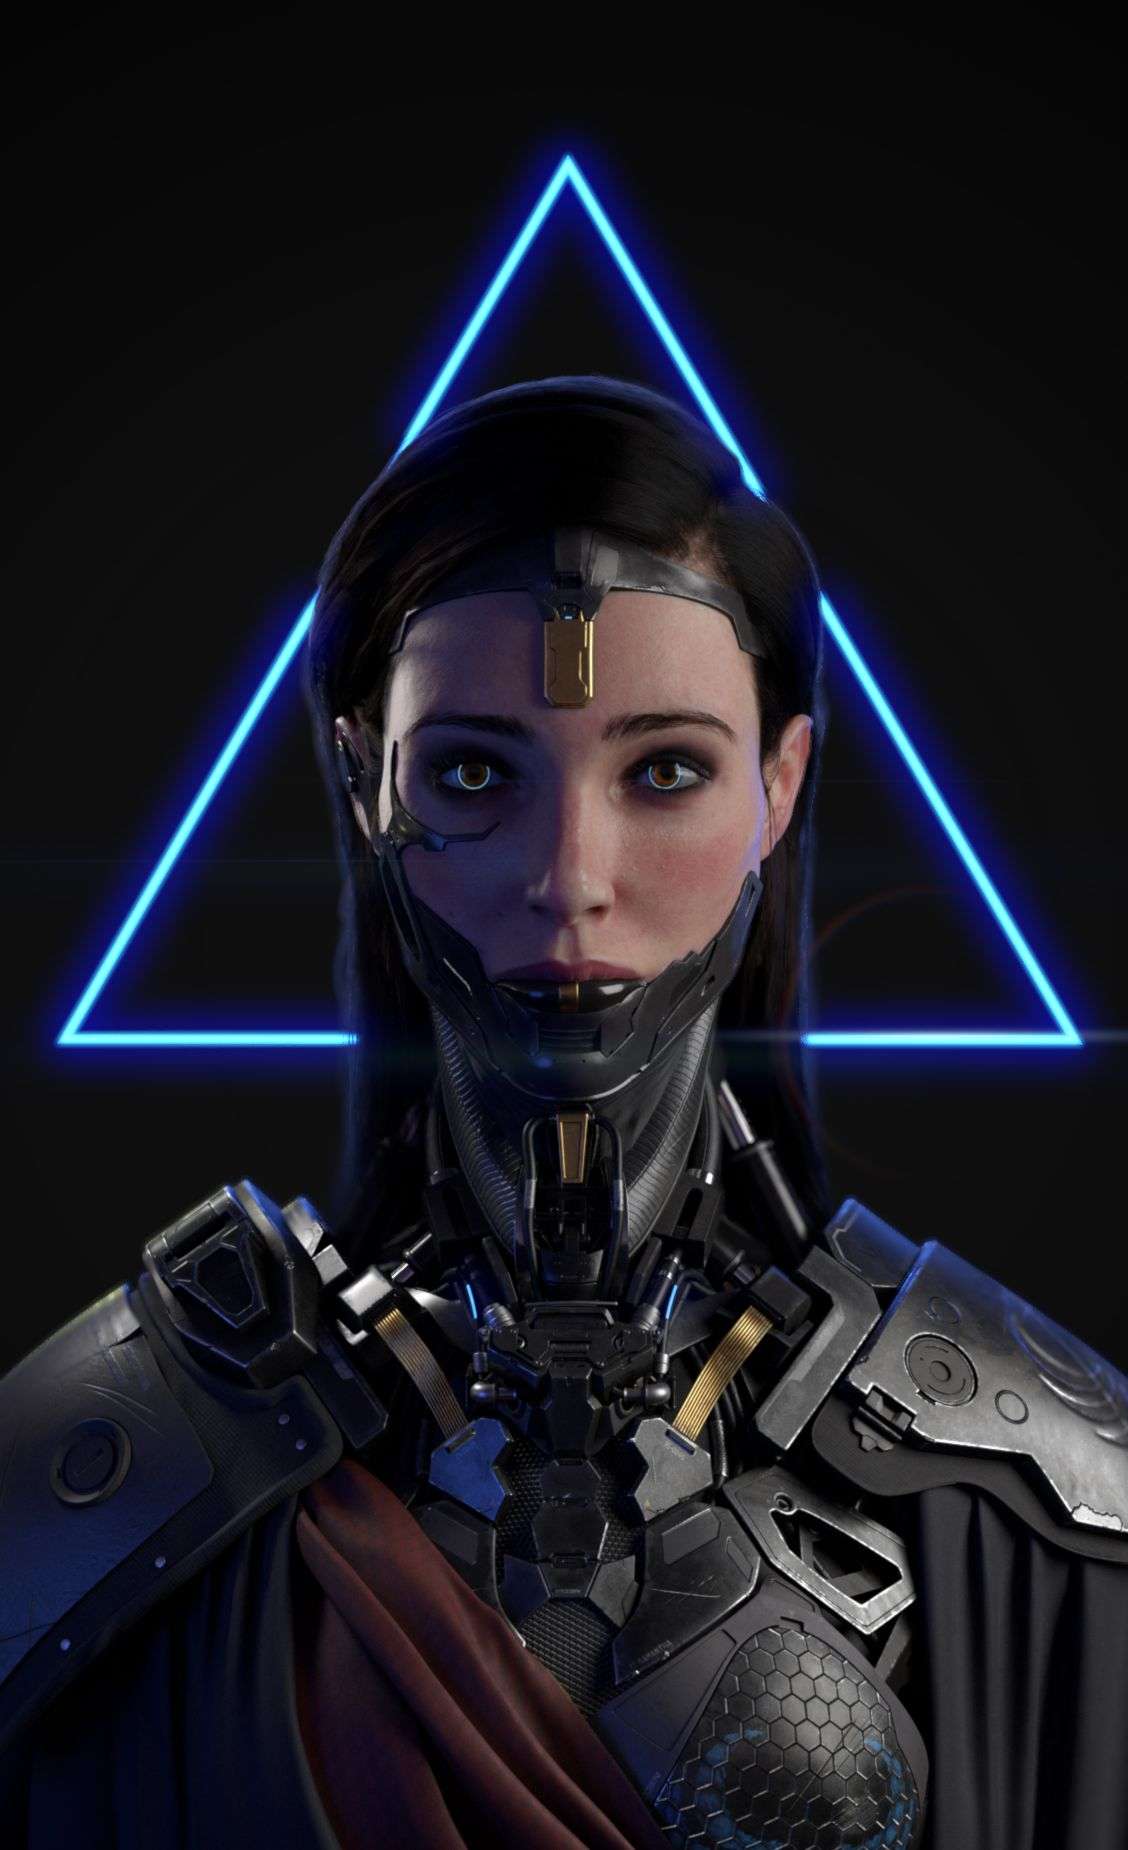
Lighting and Rendering
For the lighting, I like to commencement looking for similar renders or artworks that I like and try to mimic the way they are lightened.
In my example, I used Vray for Maya. I used a fundamental lite, Fill light and 2 rim lights. I too use an HDRI from HDRI HEAVEN. There are some theories about lighting it actually helped me determine where to put key light and other lights. Always starting time with the key light and then the rim and the fill lights.
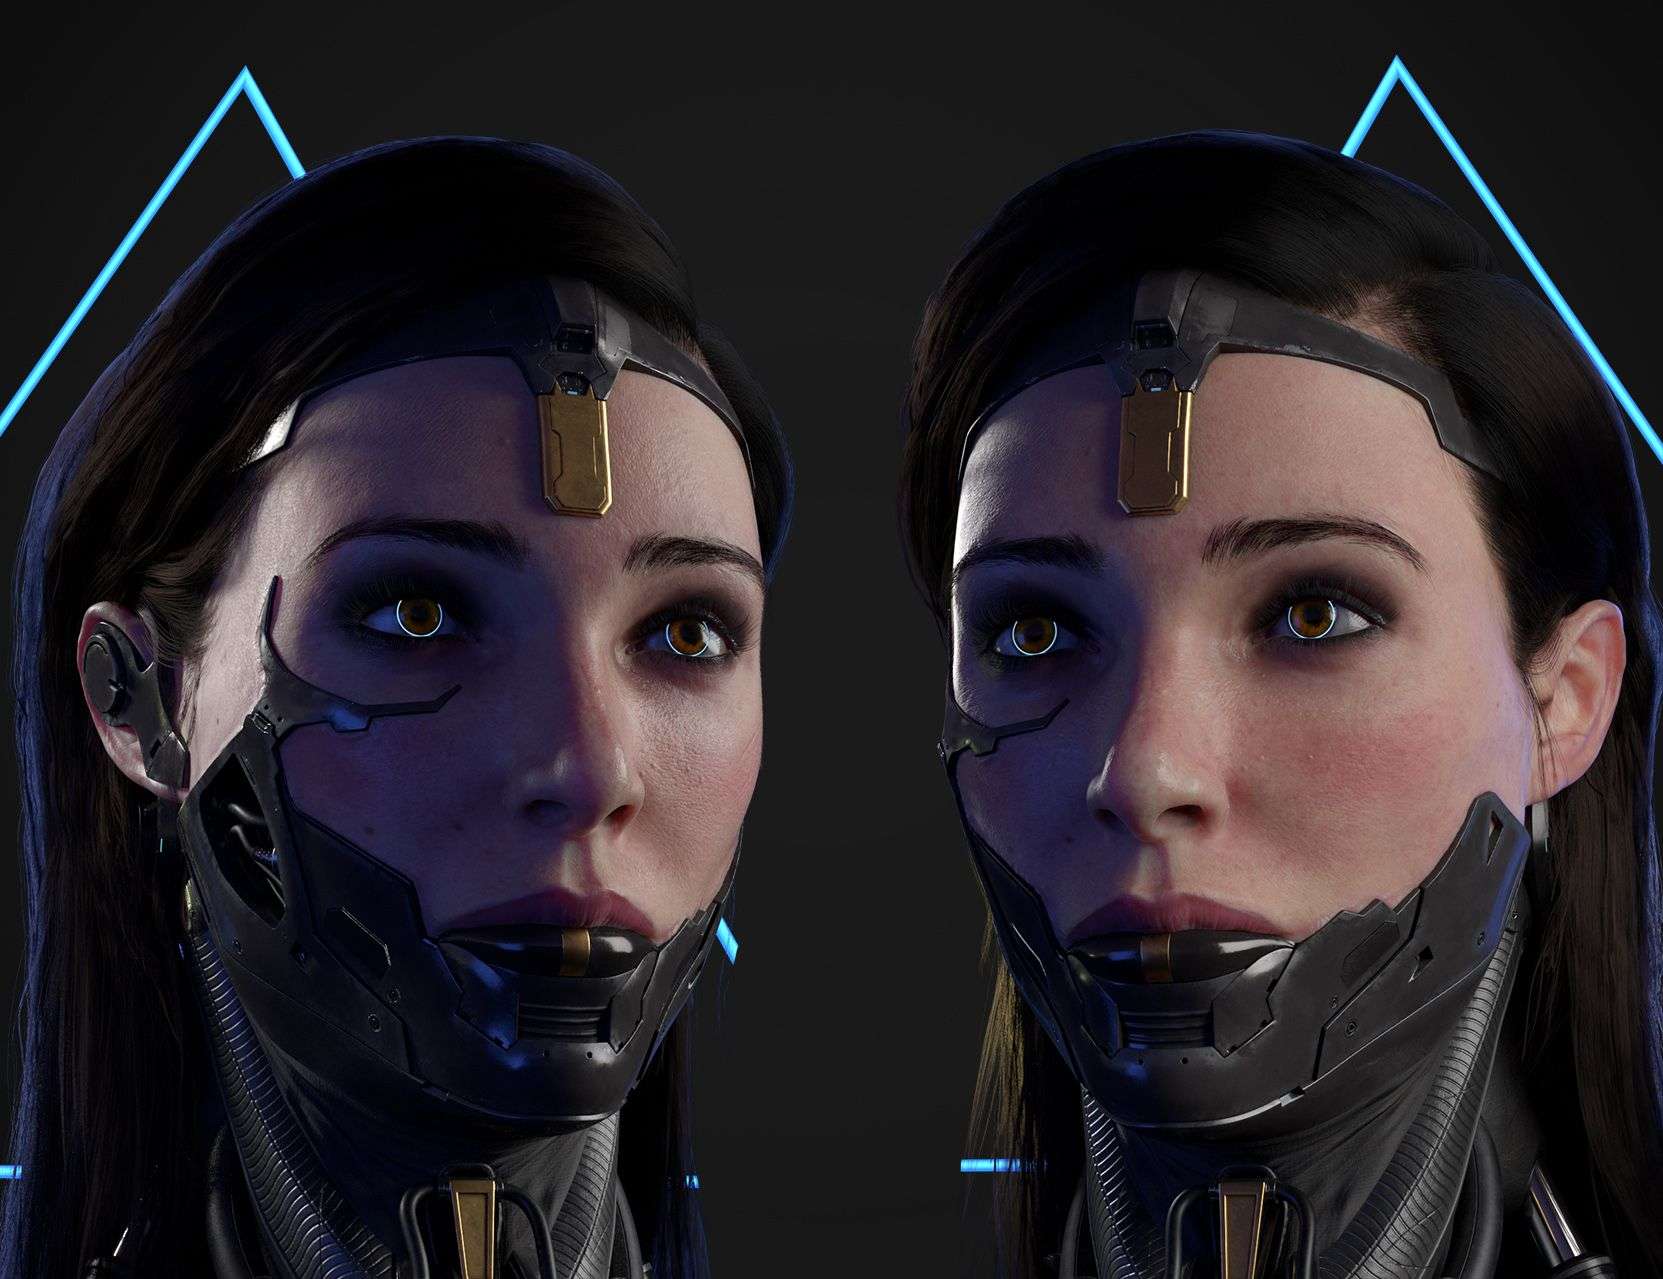
Concluding Renders & Turntable


Acknowledgment.
I want to thank all the people who helped me throughout my project. My teachers Biren Venkatraman and Marco Menco for the critic and their feedback. also my friends Arash Hadavi, Simon Almeida, Nicolò Granese, Dina Salama and Shady El-laithy for ever giving me a fresh middle and guiding me.
And special thanks to my wife for her continuous support.
ArtStation
Facebook
Instagram
LinkedIn
Source: https://discover.therookies.co/2019/12/06/creating-a-hyper-realistic-cg-character-in-3d/
Post a Comment for "artist who makes 3d drawings look real"